Connect Amazon SES
Send emails to your users through your own Amazon SES account. This page covers the steps that are specific to Amazon SES. Read Connect your email provider first for the steps that apply to every provider.
Who can use it
Only a workspace owner or admin can connect Amazon SES. Other team members cannot open the Email providers page.
Get the details from AWS
Do these steps in the AWS console first. You need the results for the form below.
- Verify the domain of your From address in Amazon SES. Amazon SES only sends from addresses and domains you have verified.
- Create an IAM user for sending mail. Attach a policy that allows
ses:SendEmail,ses:SendRawEmailandses:GetAccount. - Create an access key for that user. Copy the access key ID and the secret access key now. AWS does not show the secret access key again.
All three actions are needed. A key with only ses:SendEmail and ses:GetAccount passes the check, but every email is then refused.
Amazon's own guide to sending email is at Amazon SES: sending email with the API.
Connect Amazon SES in IvaBoard
- Open Email providers in your workspace settings.
- Under Email services, select Amazon SES.
- Type a short name in Name, such as Acme SES.
- Type the address your users see in From address. Amazon SES must have verified it.
- Optional: type the name your users see beside the address in From name.
- Choose the AWS region where your Amazon SES account is set up in AWS region.
- Paste the access key ID in AWS access key ID.
- Paste the secret access key in AWS secret access key.
- Select Connect provider.
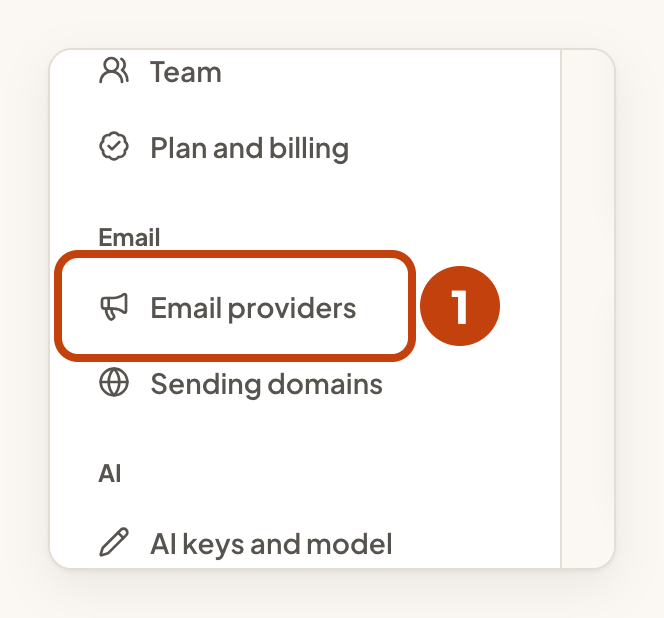
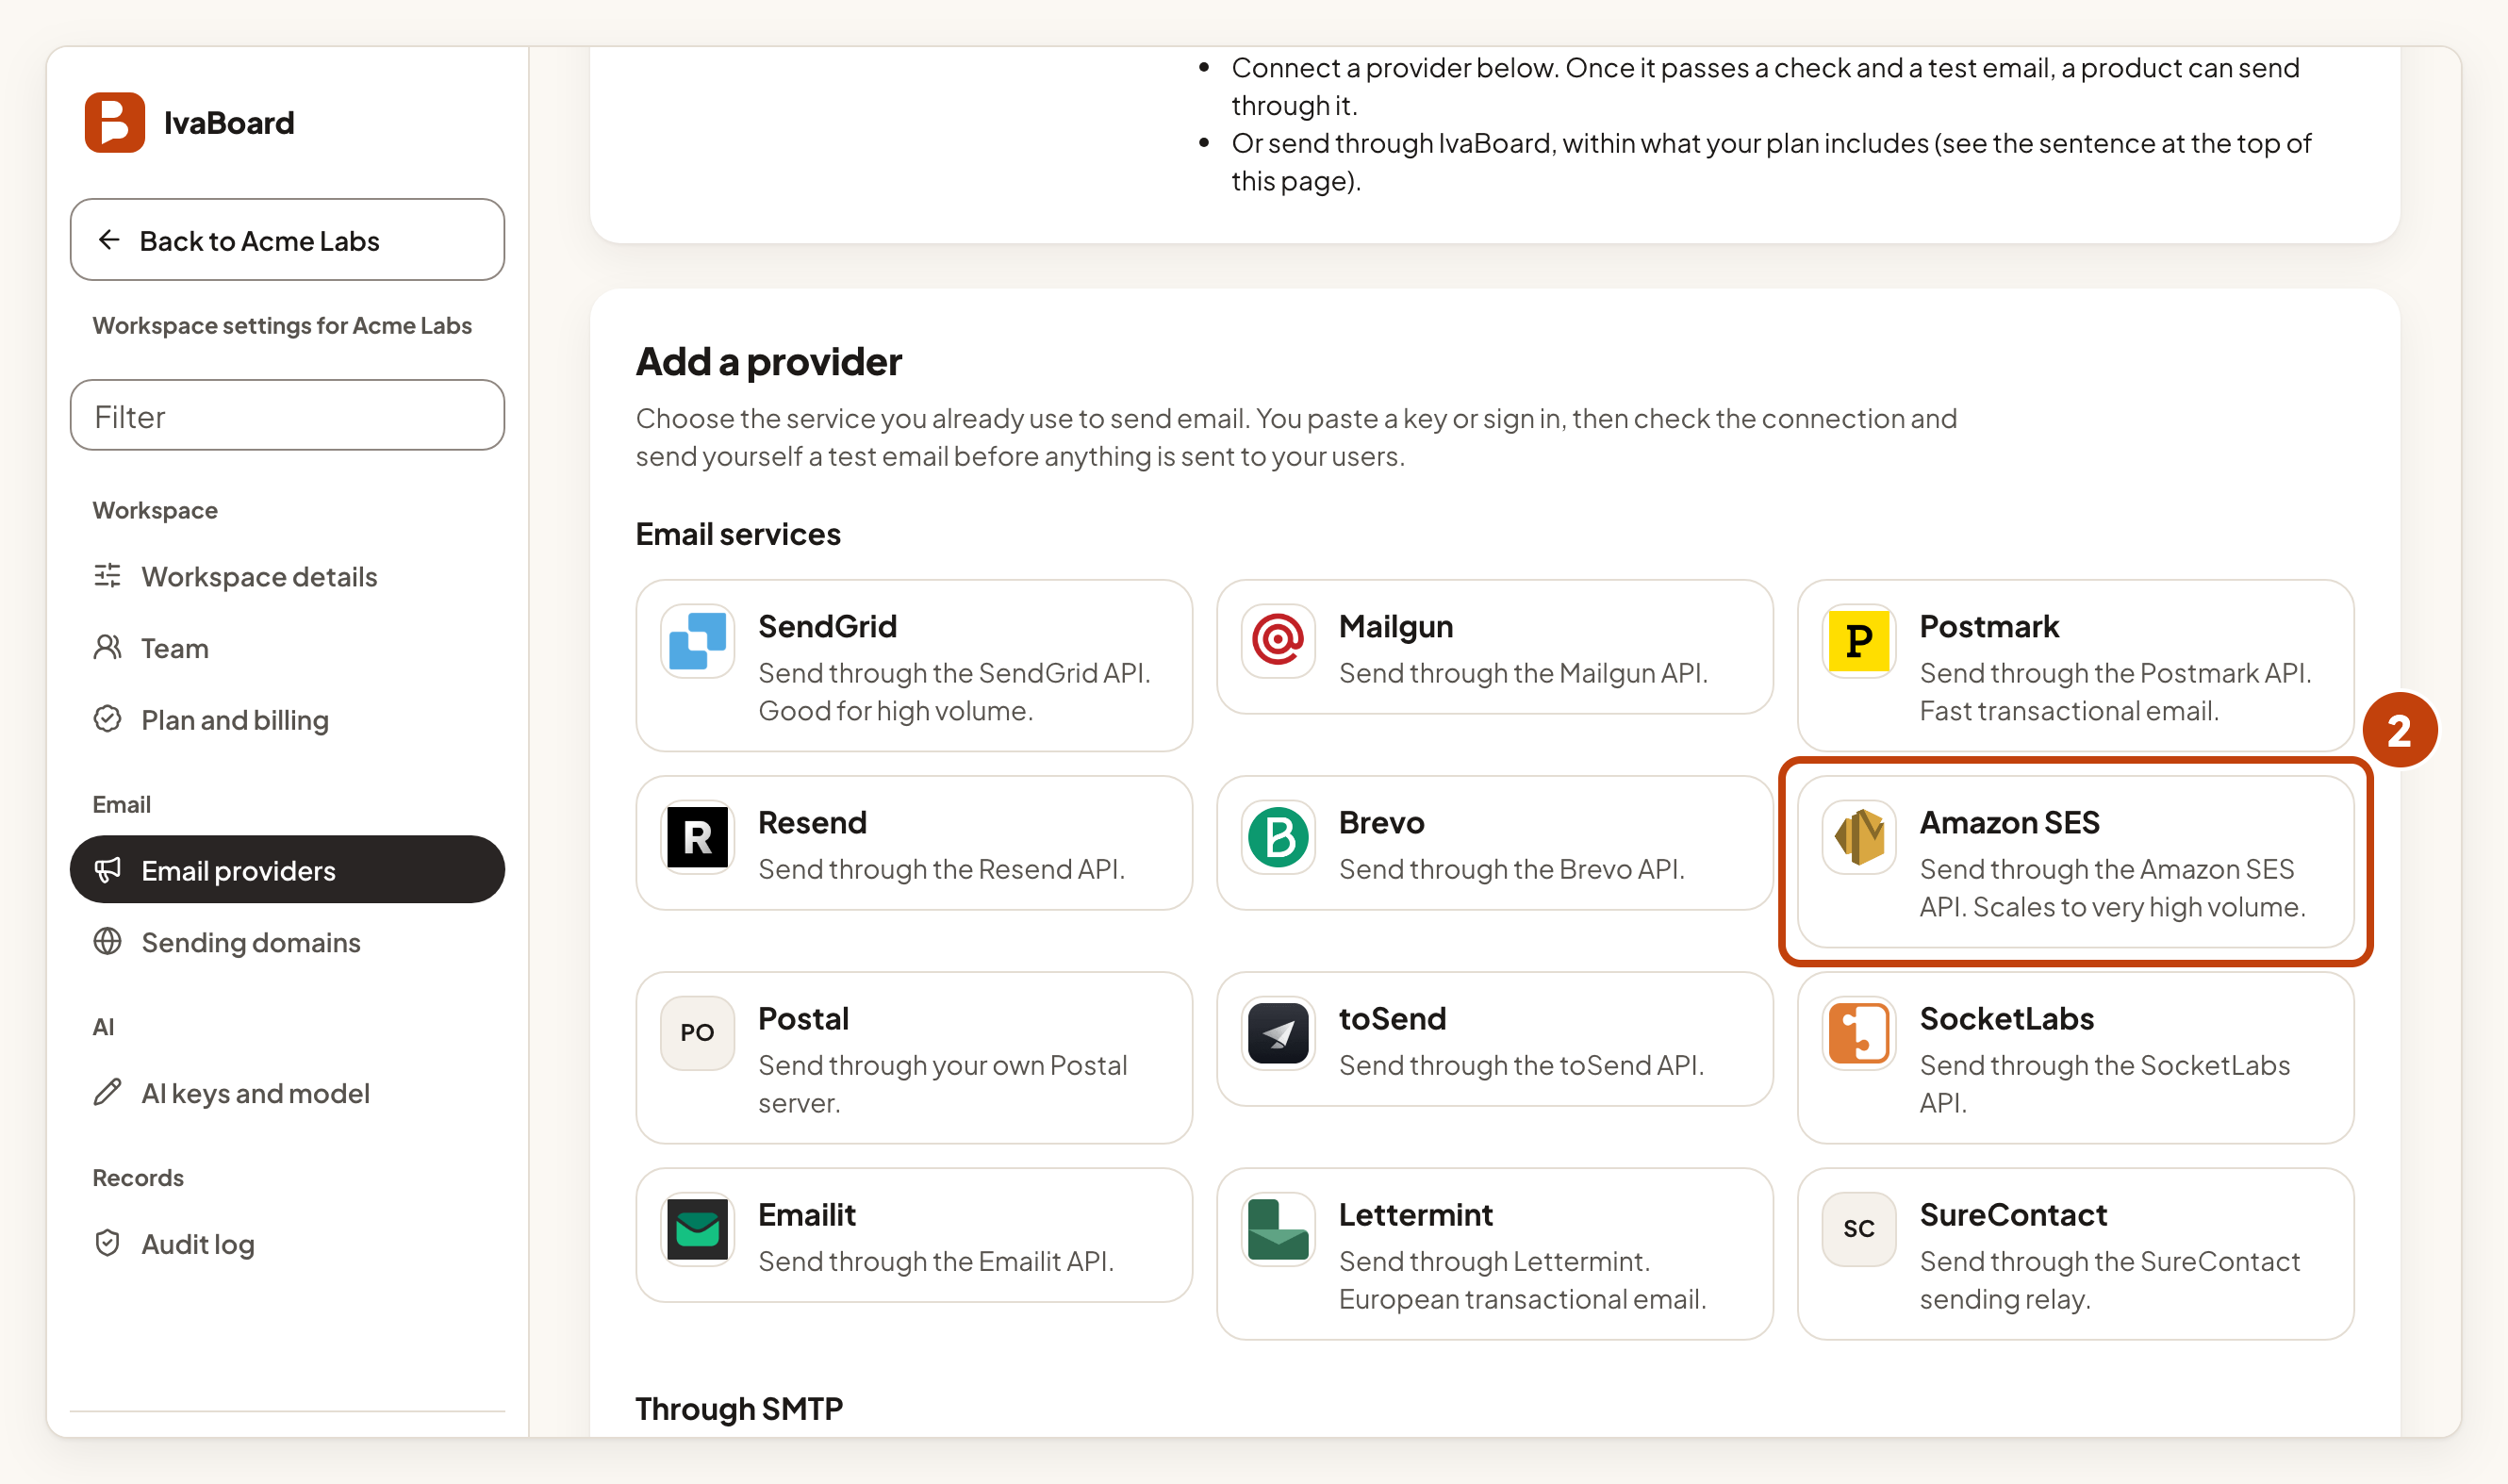
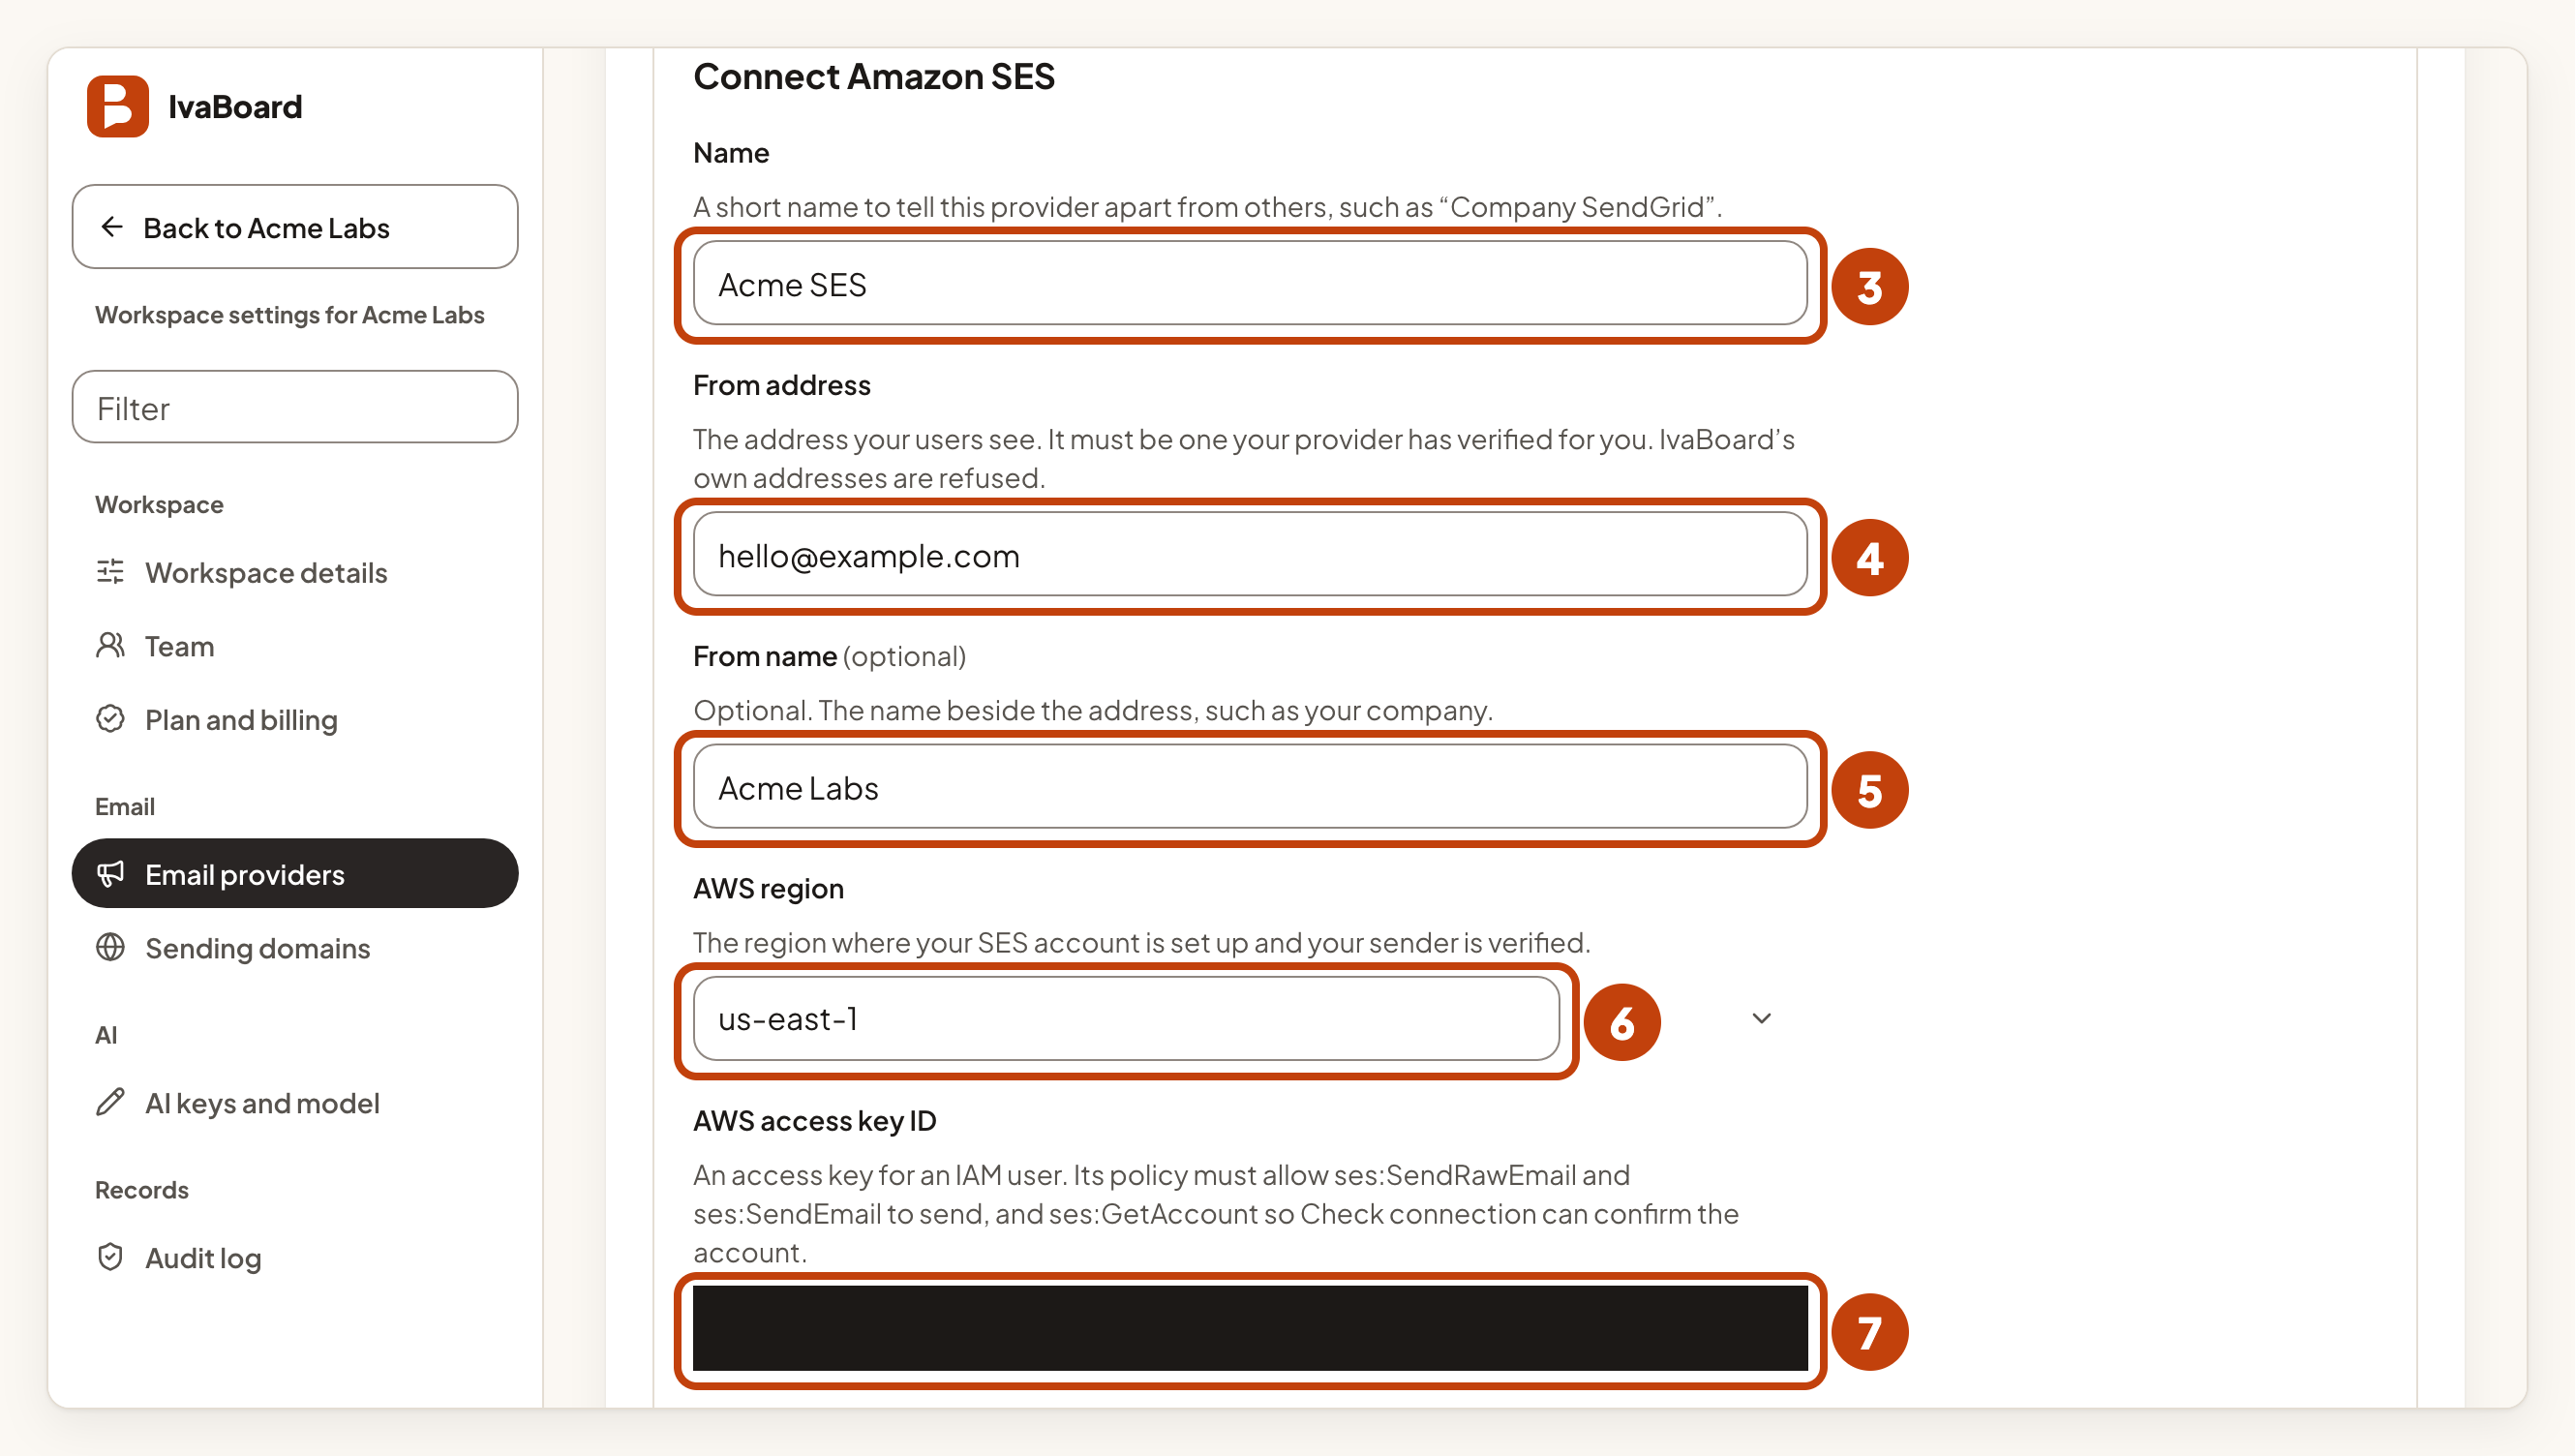
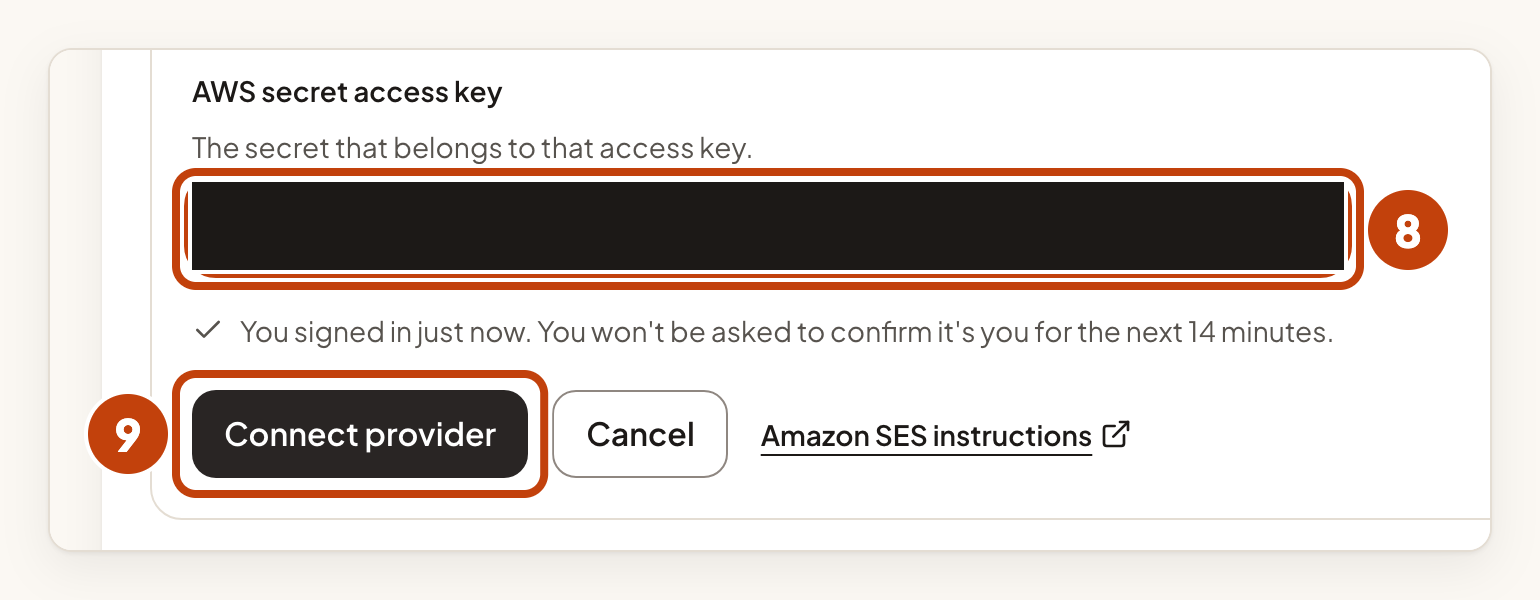
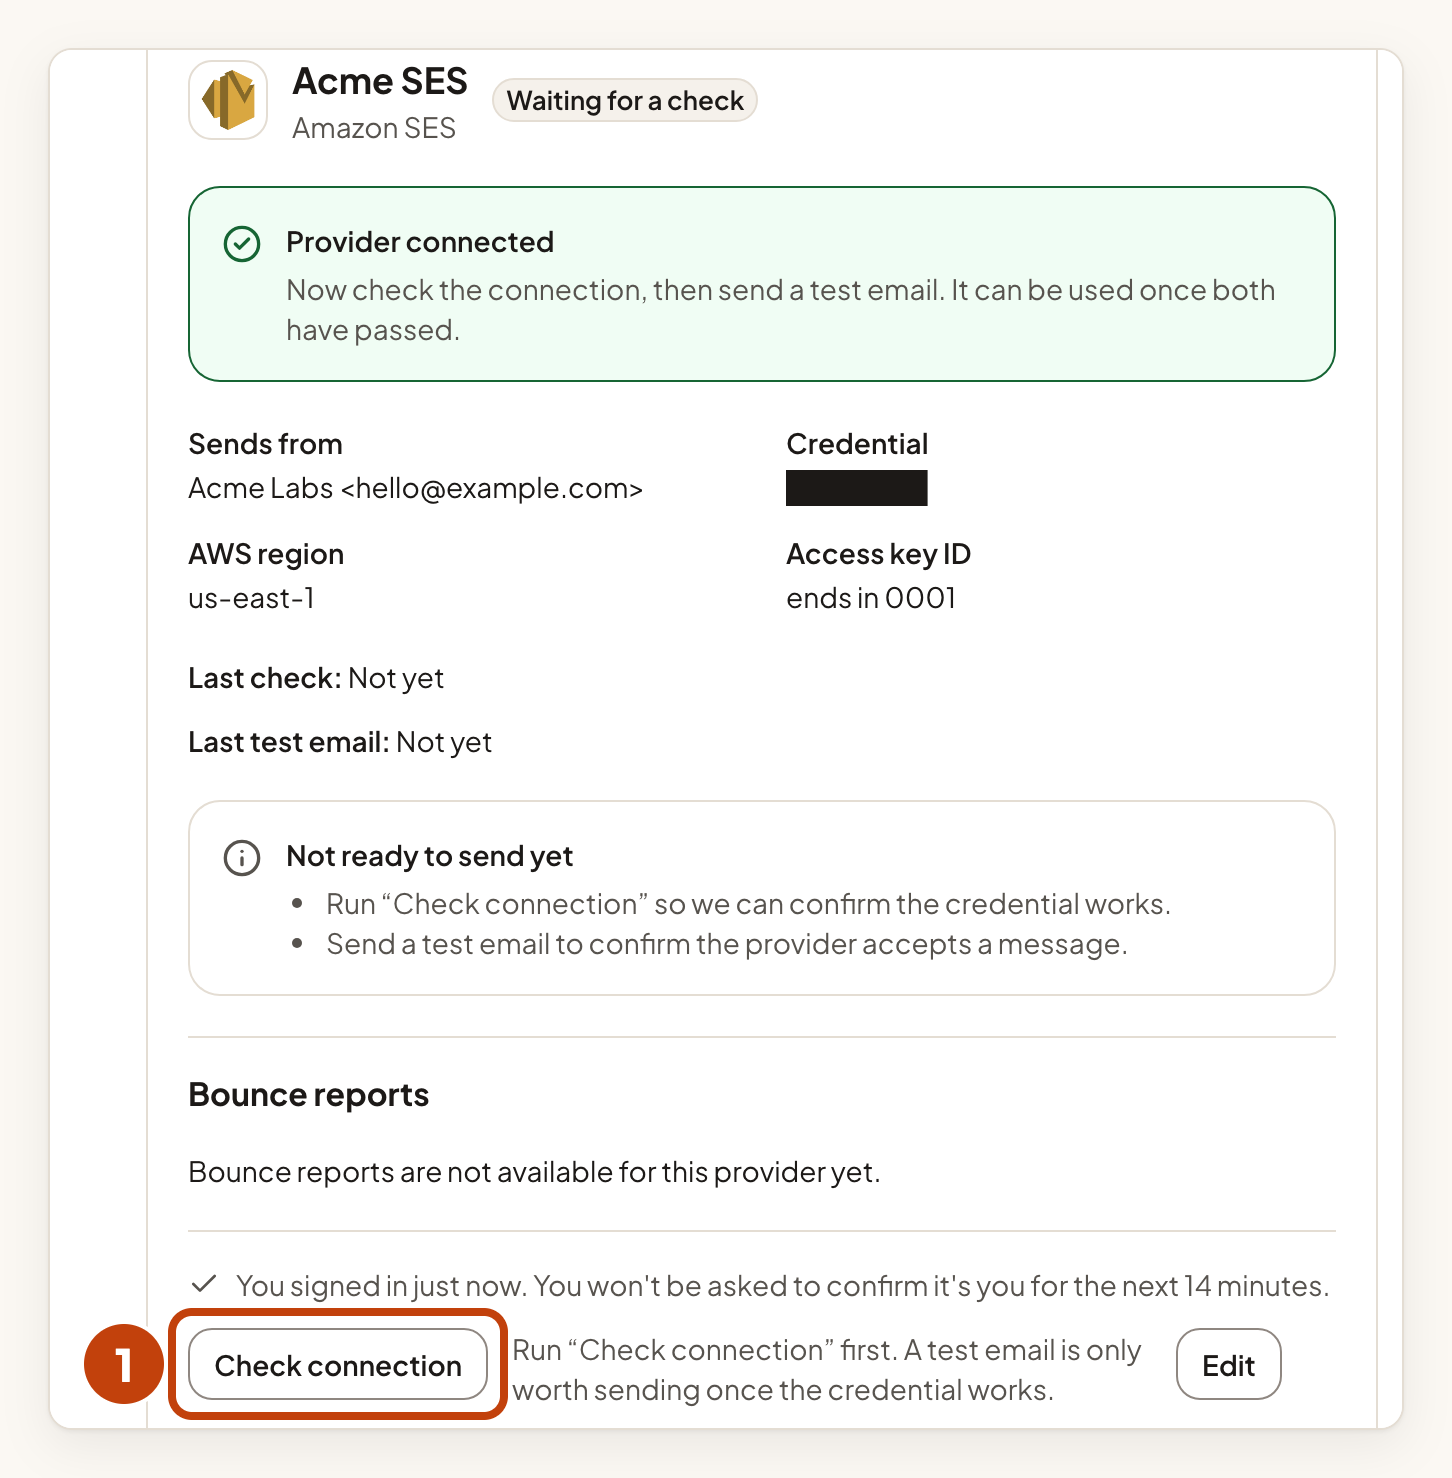
The card for the provider shows Waiting for a check. IvaBoard saves the secret access key securely. Afterwards the card shows at most its last 4 characters.
IvaBoard refuses From addresses on its own domains.
Check the connection and send a test email
- Select Check connection on the Amazon SES card.
- The result shows on the card within about a minute. If it does not, reload the page.
- Select Send a test email on the same card.
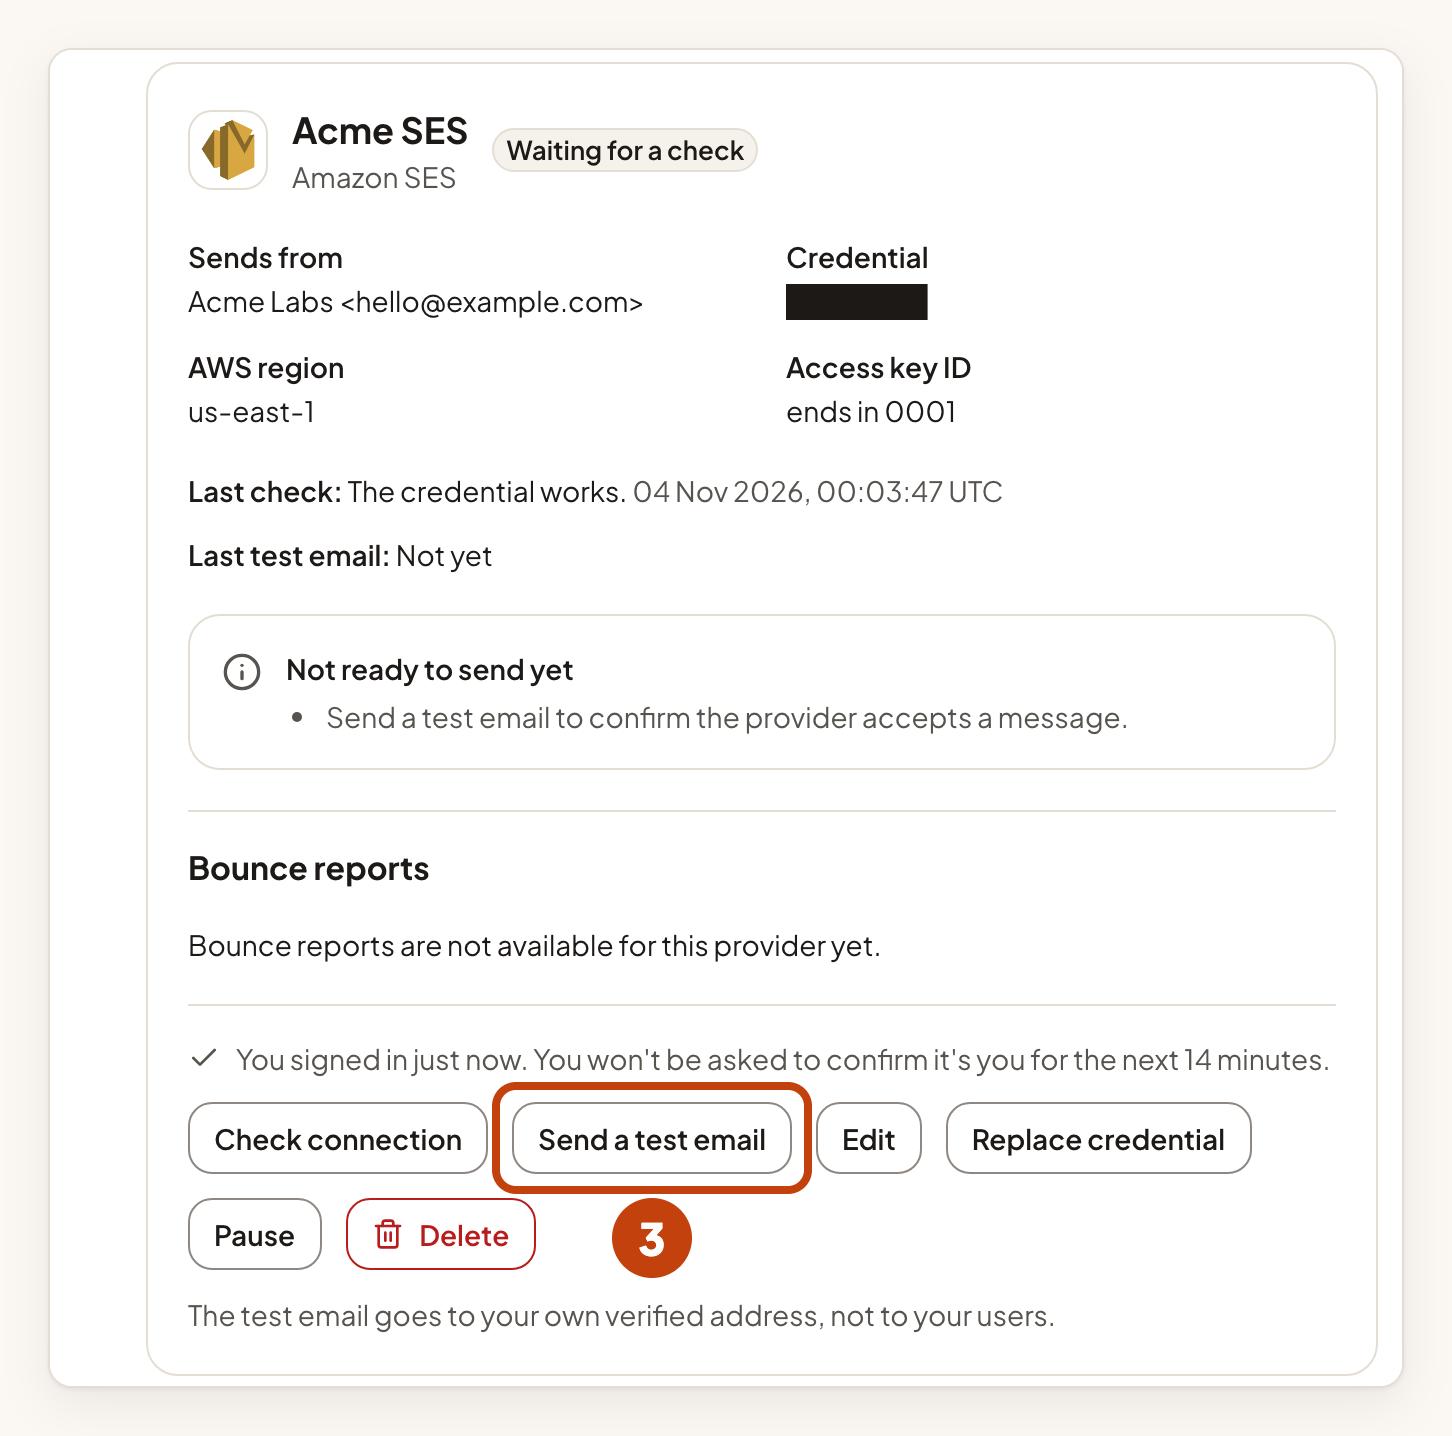
Send a test email appears after the check passes. The test email goes to your own verified address, not to your users. A provider that accepts the test has taken the message. That is not the same as the email reaching an inbox, so look in your inbox too.
When both pass, the card says "Ready. A product can choose this provider in its email sender settings."
Bounce reports
The Bounce reports part of the card says that bounce reports are not available for this provider yet.
Example
For example, Sam is an owner of the Acme Labs workspace. Sam connects Amazon SES with the name Acme SES and the From address [email protected]. Amazon SES has verified that address. Sam chooses the AWS region, pastes the access key ID and the secret access key, and selects Connect provider. After Check connection and Send a test email pass, Sam chooses Acme SES in the email sender settings of Acme Notes.
If something goes wrong
- The card says "Amazon SES refused to send with this key." Add the missing actions in AWS. Then select Replace credential, enter the key again, select Save new credential, and check the connection and send a test email again.
- The card says "The provider refused the credential." Create a new access key in AWS. Select Replace credential, enter the new key ID and secret, select Save new credential, and check the connection again.
- The card says "The provider refused the From address." Verify the address or its domain in Amazon SES. Or select Edit, change the From address, and check and test again.
More messages and fixes are in Troubleshooting email.
