Connect Mailgun
Send emails to your users through the Mailgun API, using a domain you have verified in Mailgun. This page covers the steps that are specific to Mailgun, including bounce reports. Read Connect your email provider first for the steps that apply to every provider.
Who can use it
Only a workspace owner or admin can connect Mailgun. Other team members cannot open the Email providers page.
Get the details from Mailgun
- Verify the sending domain you want to use in Mailgun, for example mg.example.com.
- Open the domain page in Mailgun and note its region. It is either the United States or Europe.
- Copy your private API key from Mailgun.
Connect Mailgun in IvaBoard
- Open Email providers in your workspace settings.
- Under Email services, select Mailgun.
- Type a short name in Name, such as Acme Mailgun.
- Type the address your users see in From address. Mailgun must have verified it.
- Optional: type the name your users see beside the address in From name.
- Type the sending domain in Sending domain, such as mg.example.com.
- Choose the region shown on your Mailgun domain page in Mailgun region.
- Paste the private API key in Private API key.
- Select Connect provider.
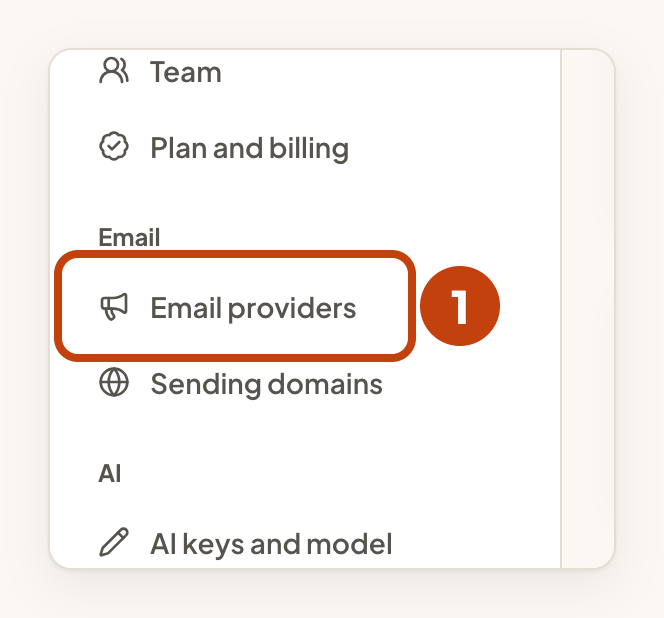
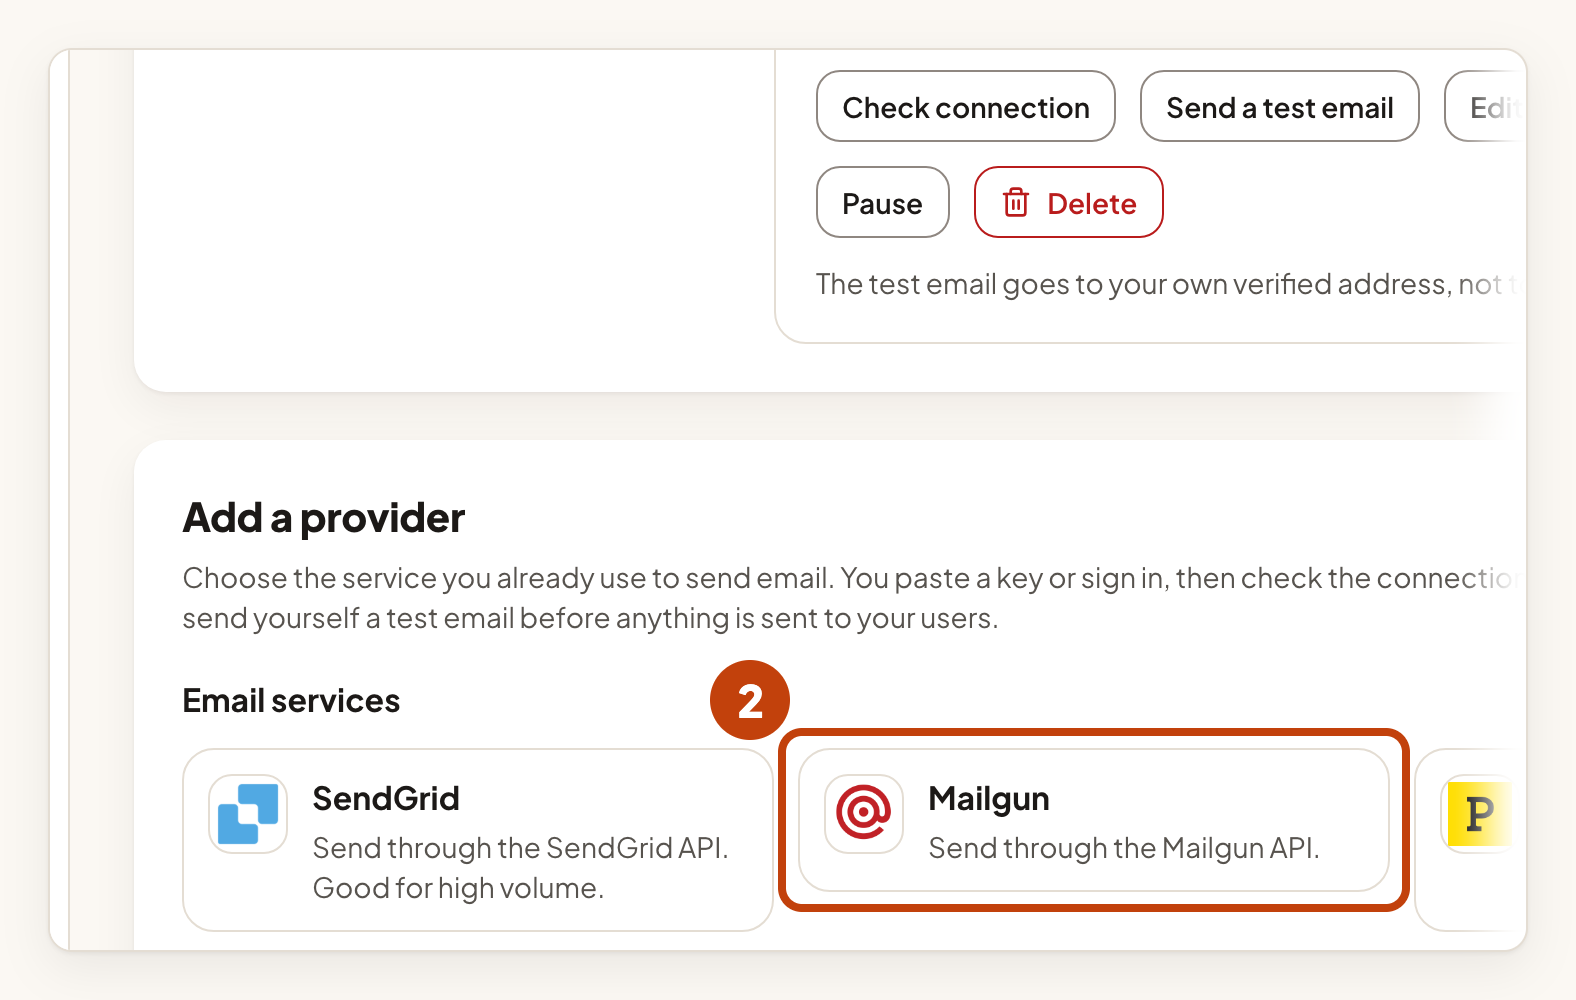
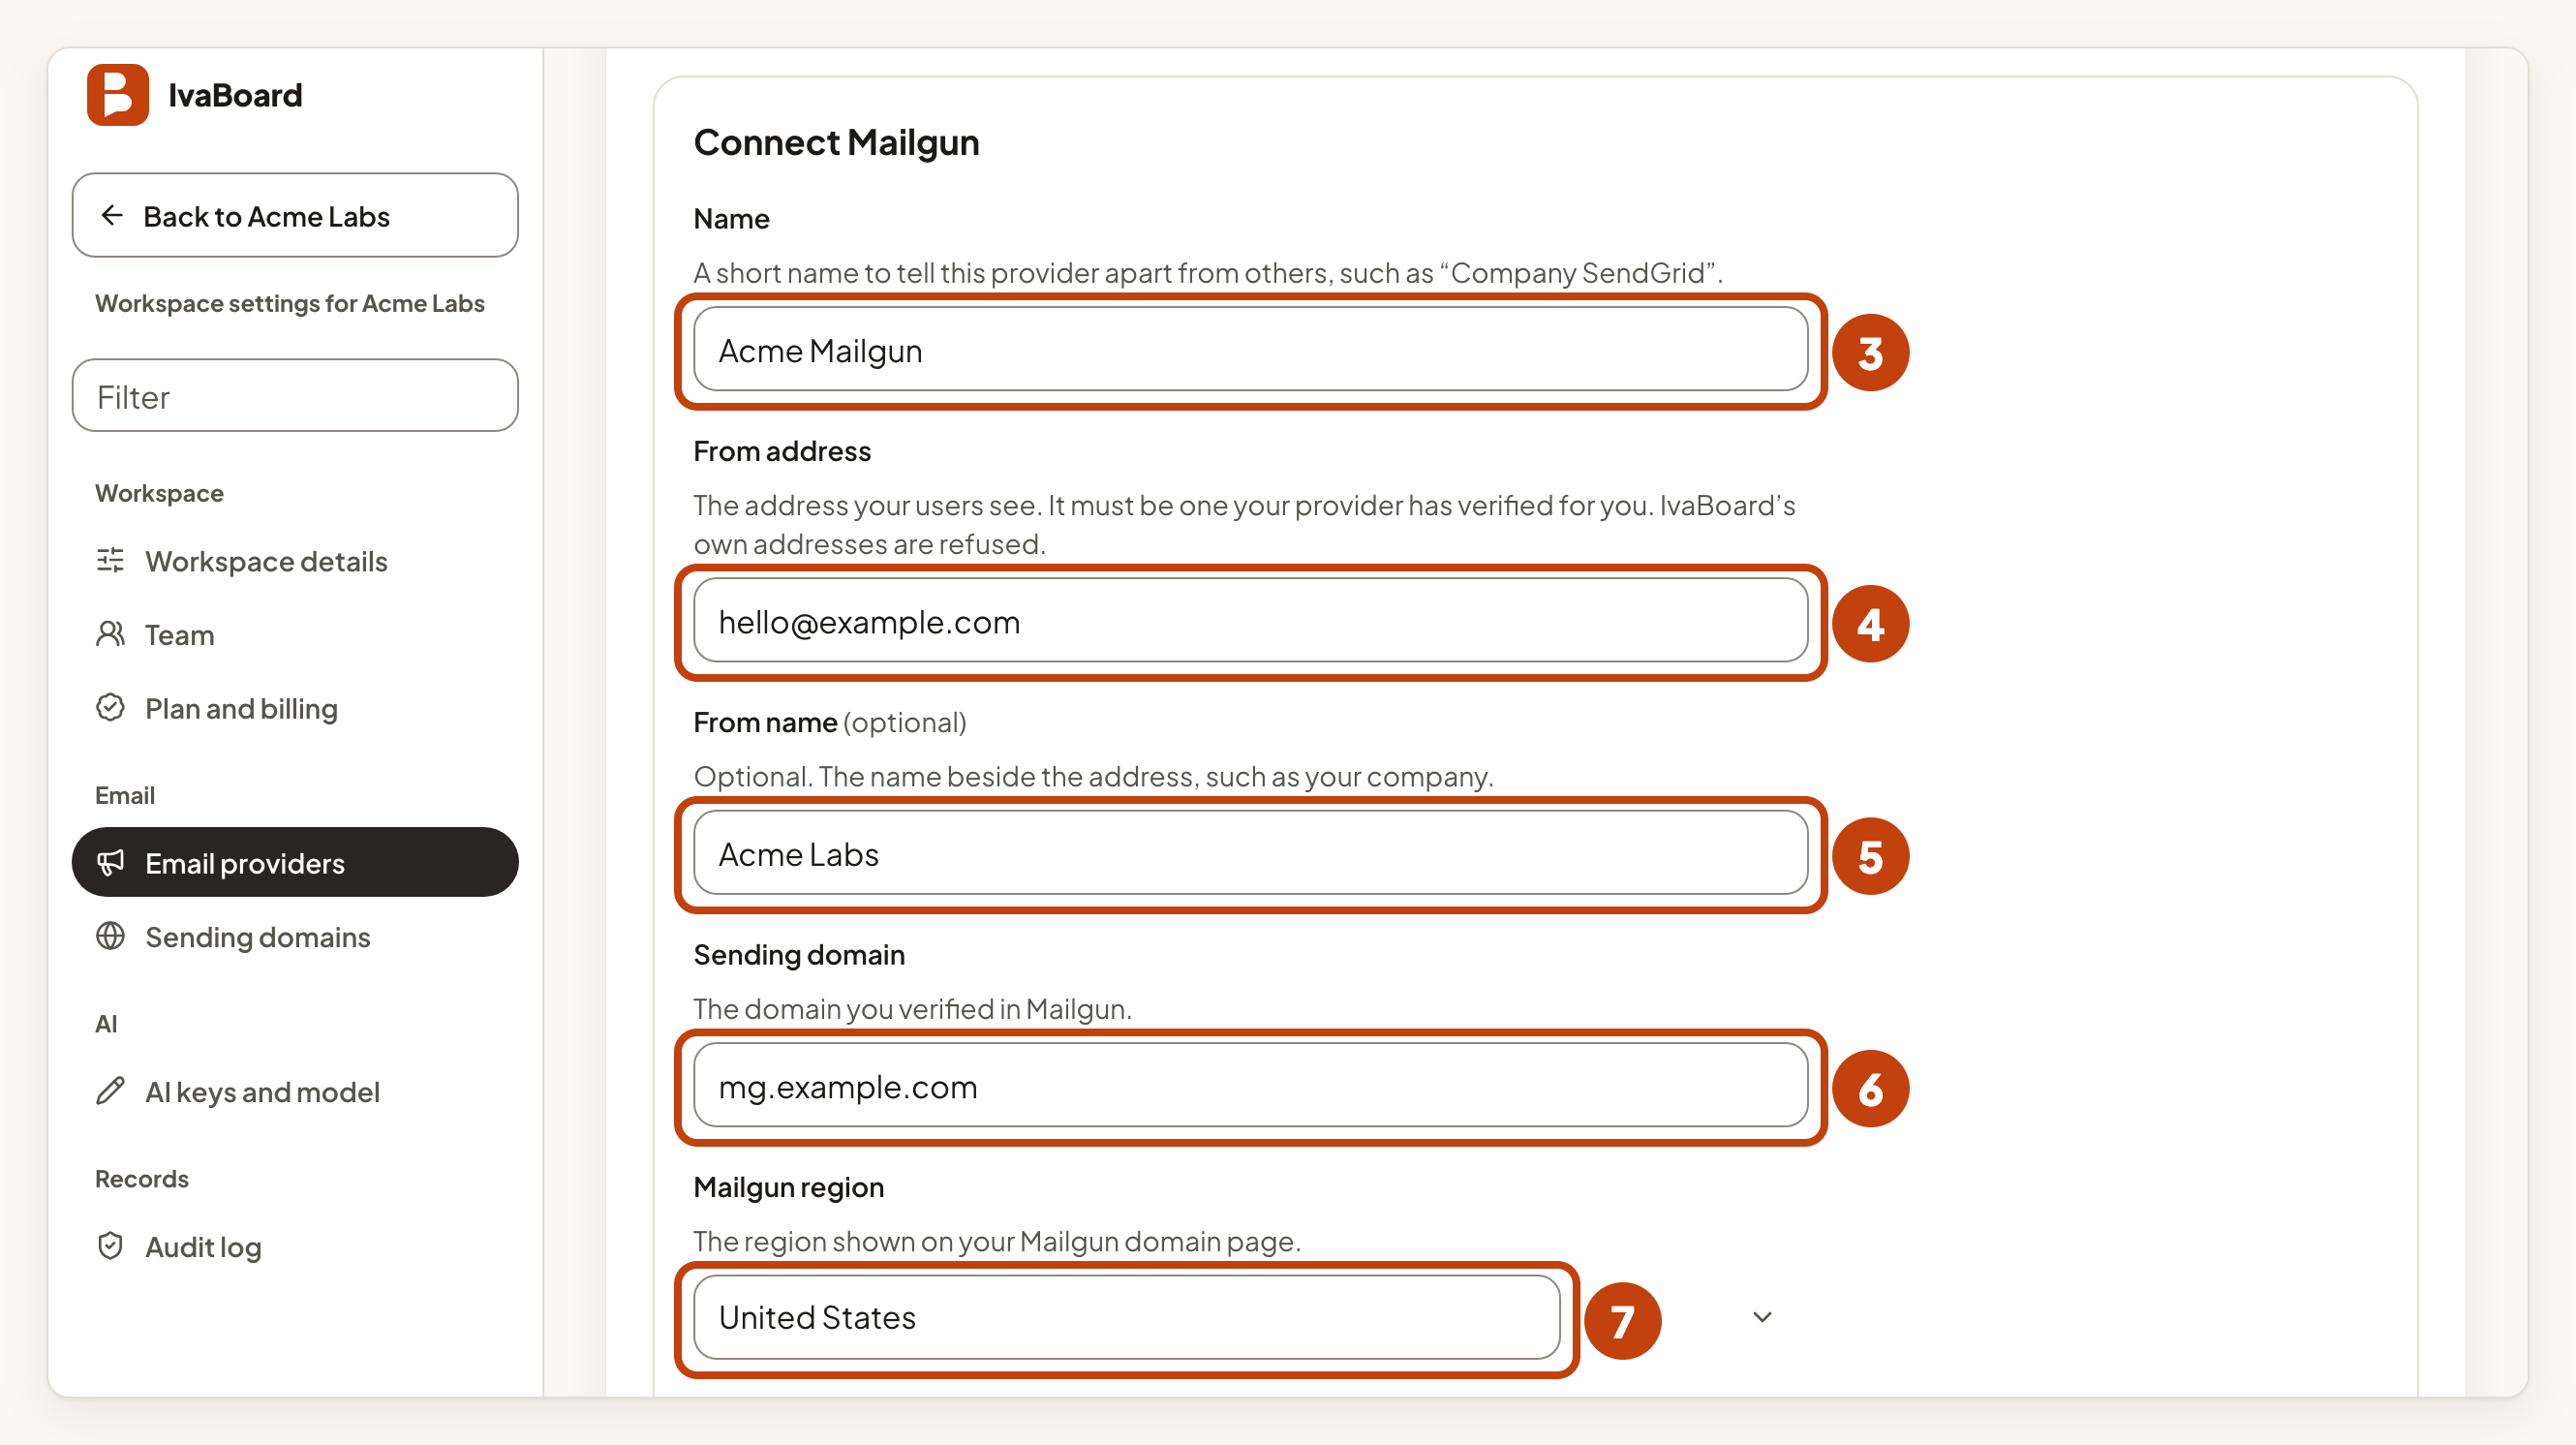
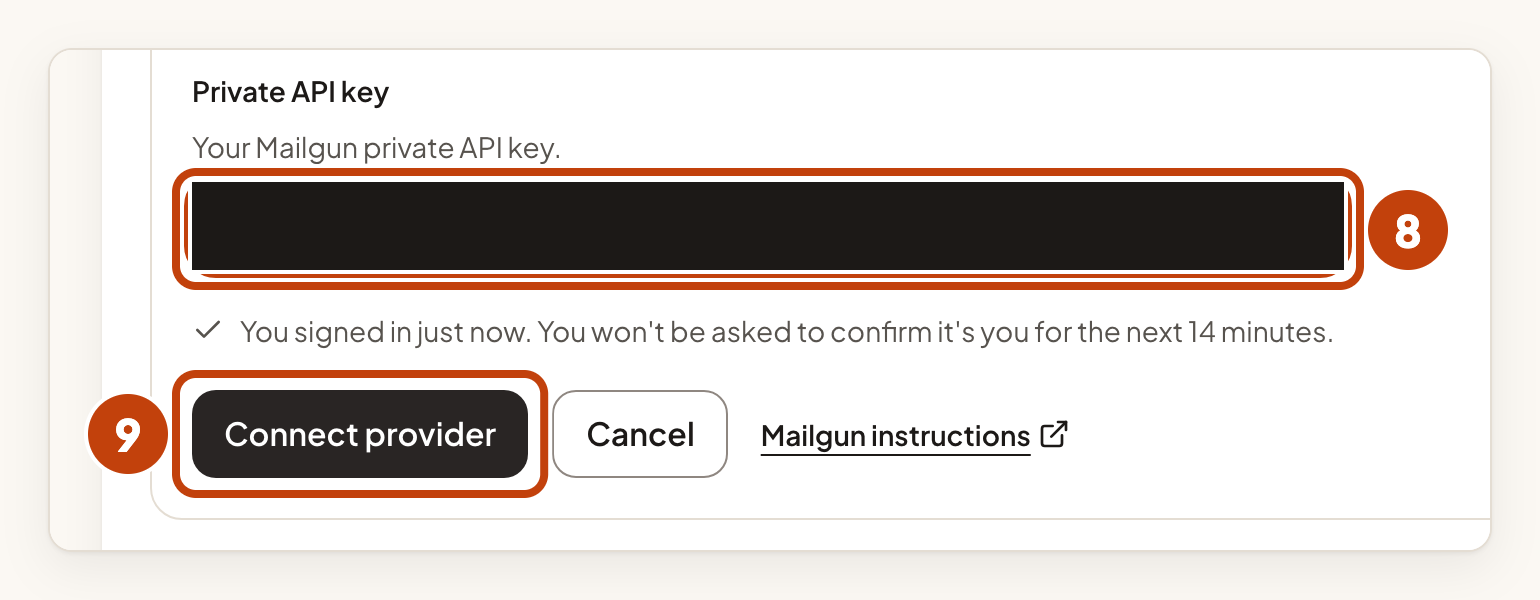
IvaBoard saves the key securely. Afterwards the card shows at most its last 4 characters. The card shows Waiting for a check.
IvaBoard refuses From addresses on its own domains.
Check the connection and send a test email
- Select Check connection on the Mailgun card.
- The result shows on the card within about a minute. If it does not, reload the page.
- Select Send a test email on the same card.
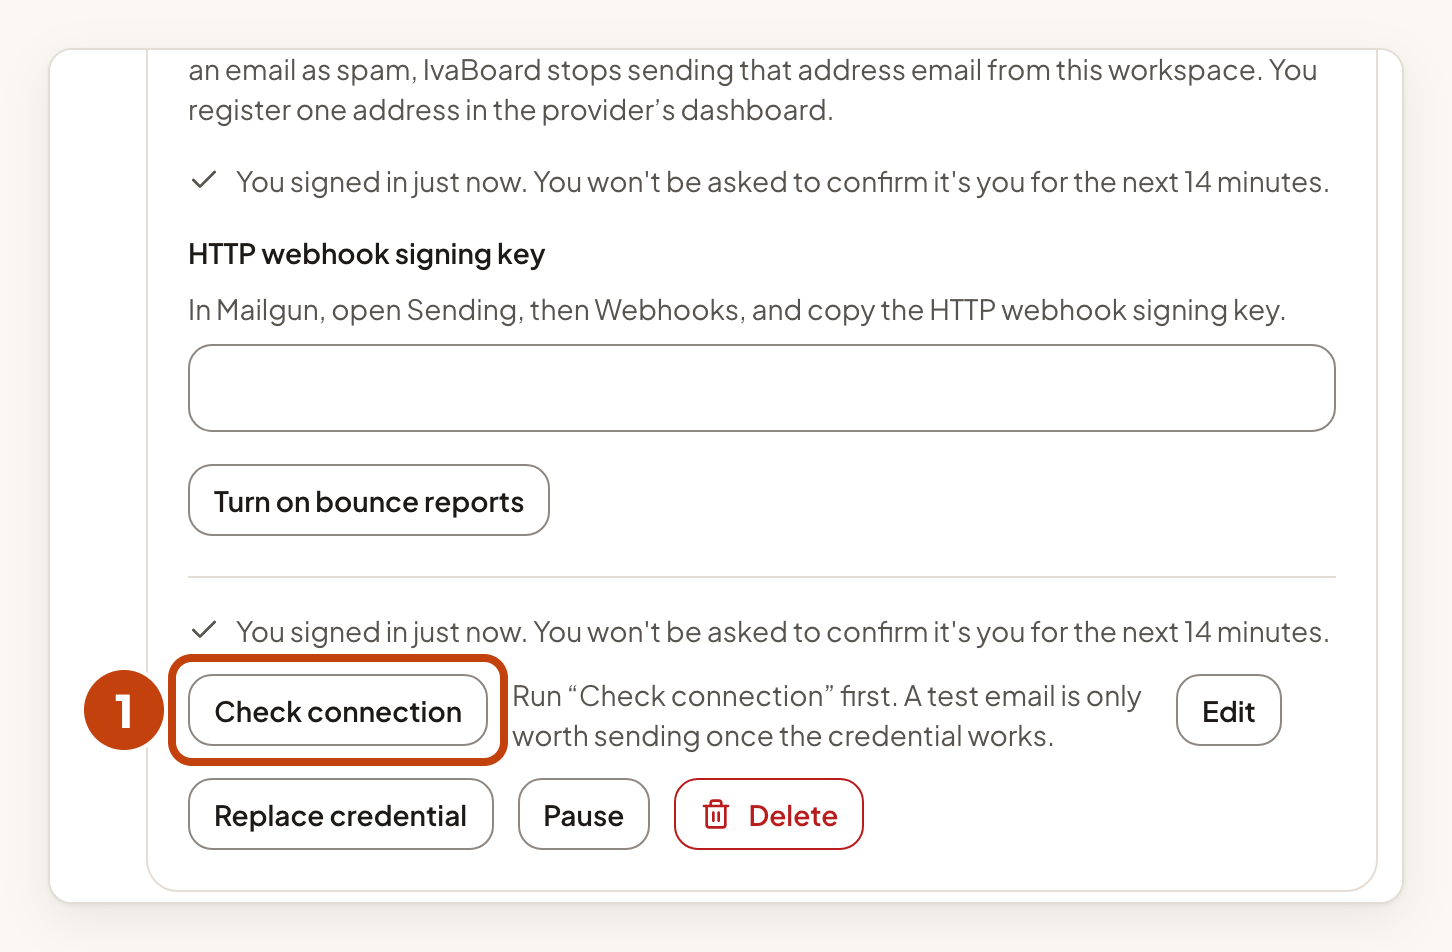
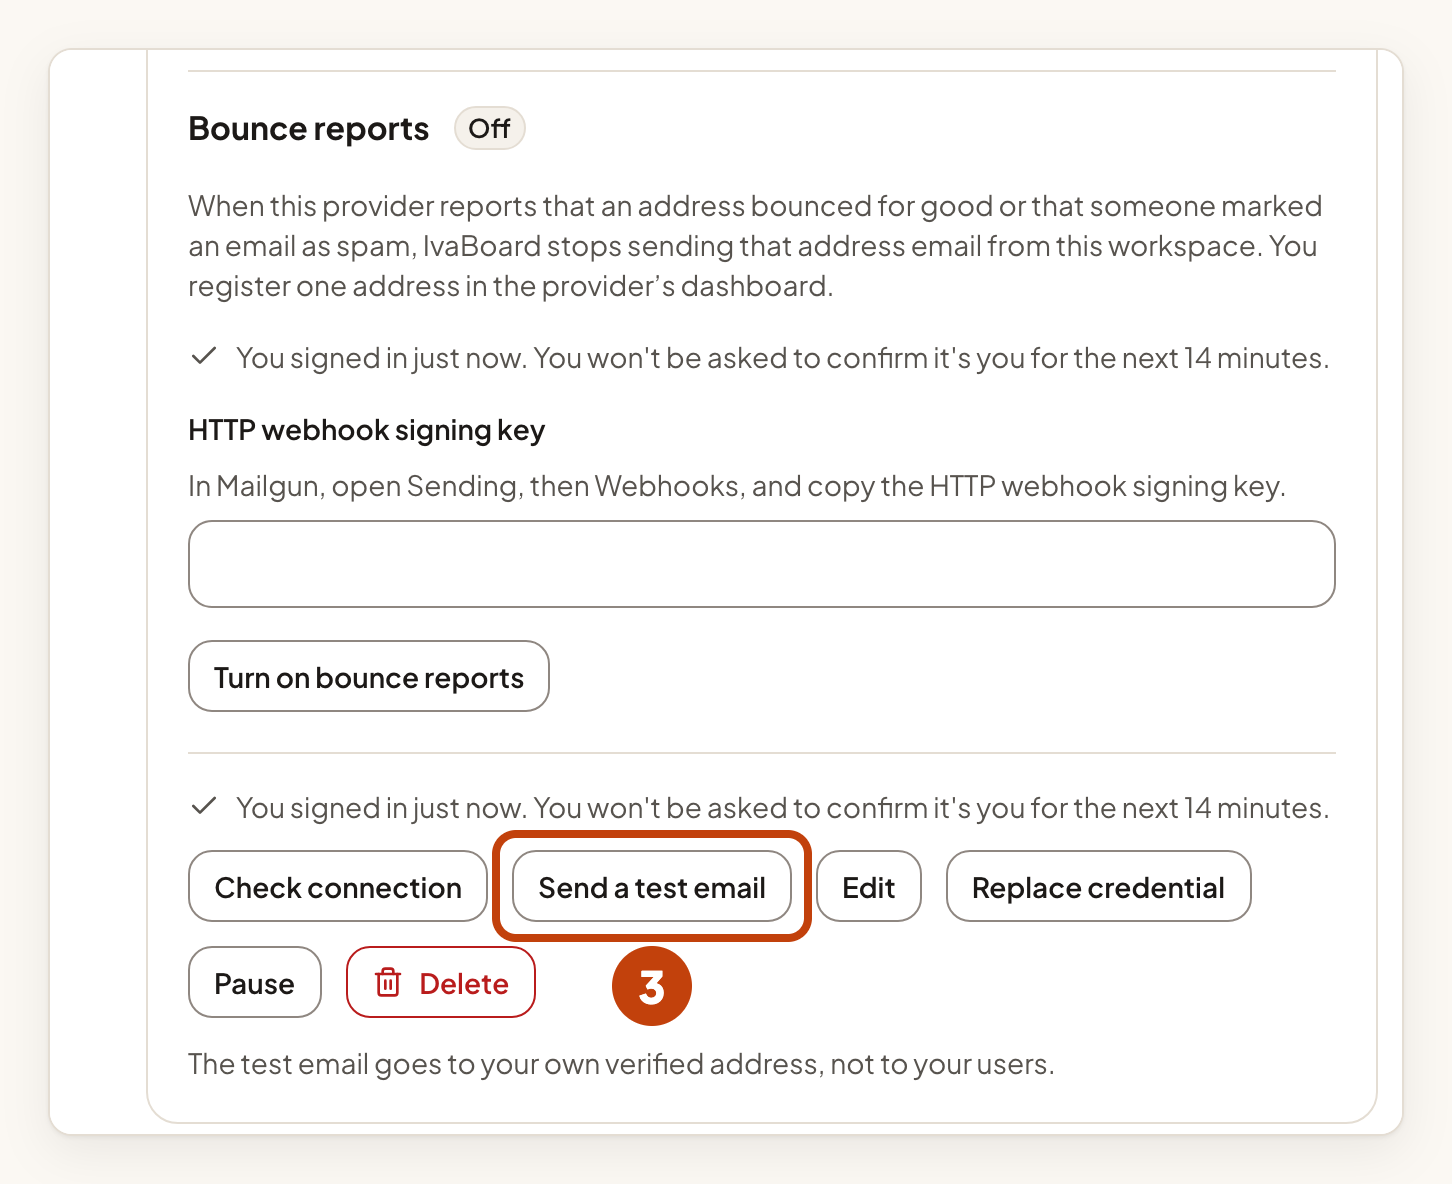
Send a test email appears after the check passes. The test email goes to your own verified address, not to your users. A provider that accepts the test has taken the message. That is not the same as the email reaching an inbox, so look in your inbox too.
When both pass, the card says "Ready. A product can choose this provider in its email sender settings."
Bounce reports
Bounce reports let Mailgun tell IvaBoard about two kinds of email. A permanent bounce means the address cannot receive email. A spam complaint means someone marked your email as spam. IvaBoard then stops sending email to that address from your workspace. Temporary problems are ignored.
Get the signing key in Mailgun
- Open Sending in Mailgun.
- Open Webhooks.
- Copy the HTTP webhook signing key.
Turn on bounce reports in IvaBoard
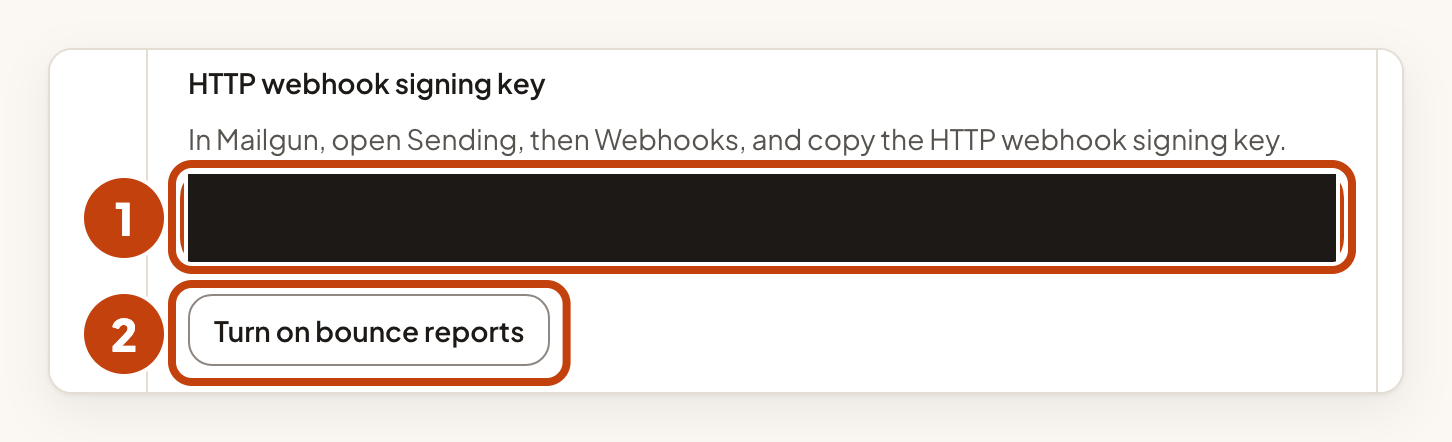
- Paste the HTTP webhook signing key in the Bounce reports part of the Mailgun card.
- Select Turn on bounce reports on the same card.
- Select Copy next to Webhook address.
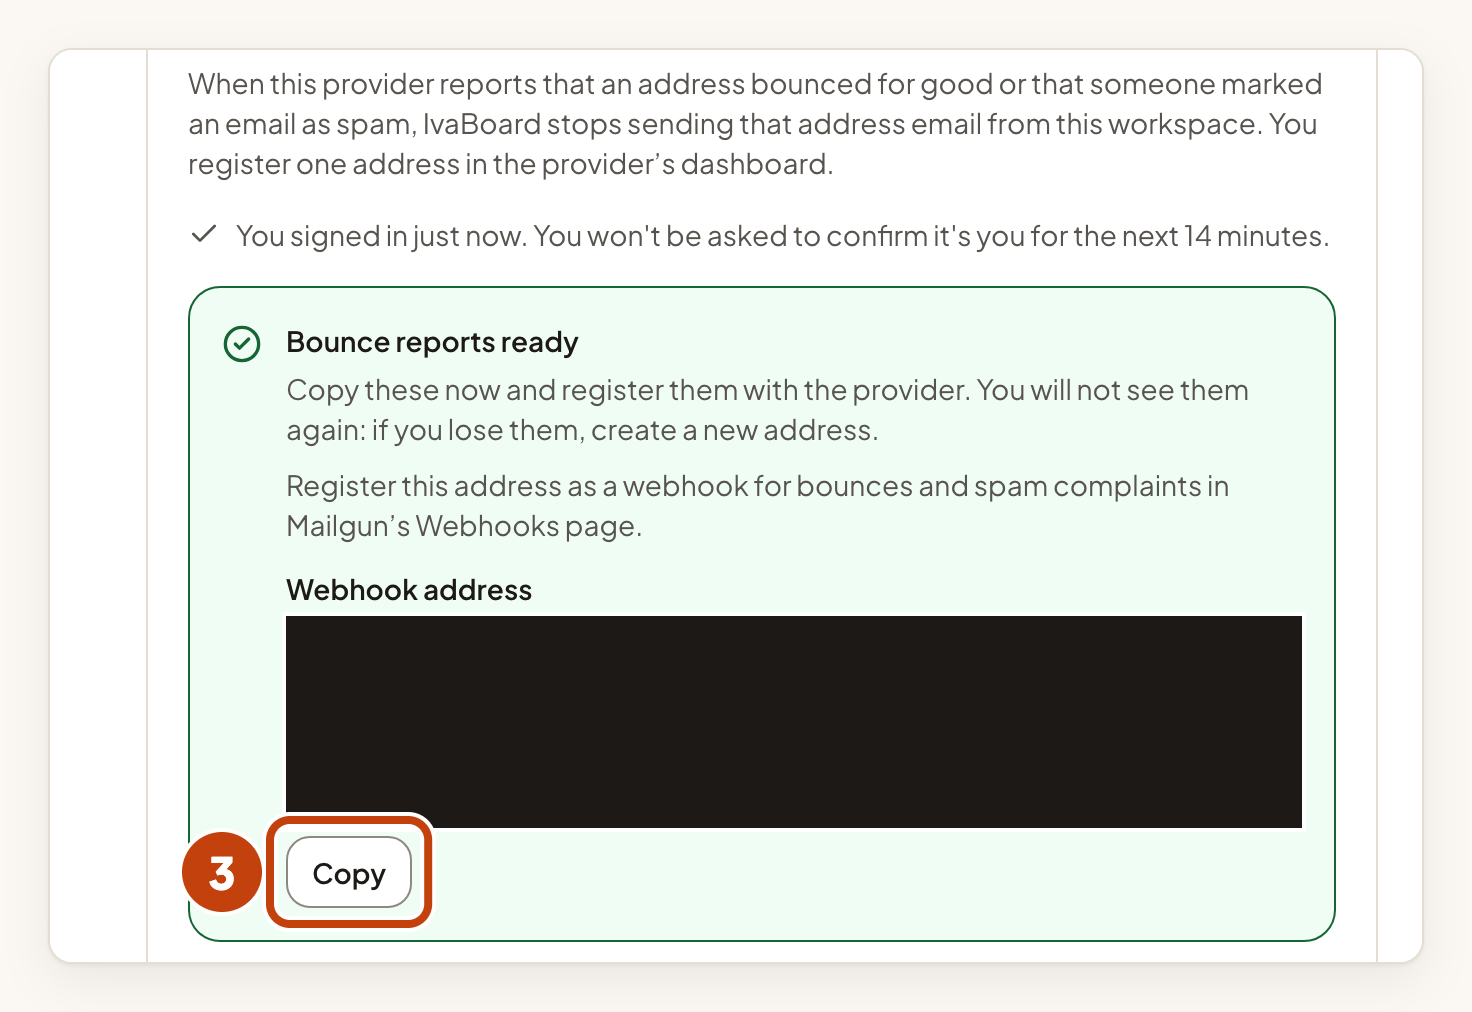
IvaBoard shows the webhook address only once. Copy it before you leave the page. To get a new one later, select New address. The old address stops working at once.
Add the webhook in Mailgun
- Open the Webhooks page in Mailgun.
- Add the Webhook address as a webhook for bounces and spam complaints.
When a report arrives, the card shows Last report received with the time. If reports stop arriving, check that Mailgun has the latest webhook address.
Example
For example, Sam is an owner of the Acme Labs workspace. Sam connects Mailgun with the name Acme Mailgun, the From address [email protected] and the sending domain mg.example.com. The region is the United States. After Check connection and Send a test email pass, Sam turns on bounce reports, copies the webhook address, and adds it to Mailgun.
If something goes wrong
- The card says "The provider’s key was not accepted." Copy the HTTP webhook signing key again, exactly as Mailgun shows it.
- The card says "The provider refused the credential." Create a new private API key in Mailgun. Select Replace credential, paste the new key in Private API key, select Save new credential, and check the connection again.
- The card says "The provider refused the From address." Verify the address or its domain in Mailgun. Or select Edit, change the From address, and check and test again.
More messages and fixes are in Troubleshooting email.
