Invite your team
Invite colleagues by email to join your workspace. You choose their role and, if you like, which products they can work on and for how long.
Who can use it
Owners and admins can invite people, send a link again, and revoke invitations. Only an owner can invite someone as an owner. Every plan has no limit on team members.
Send an invitation
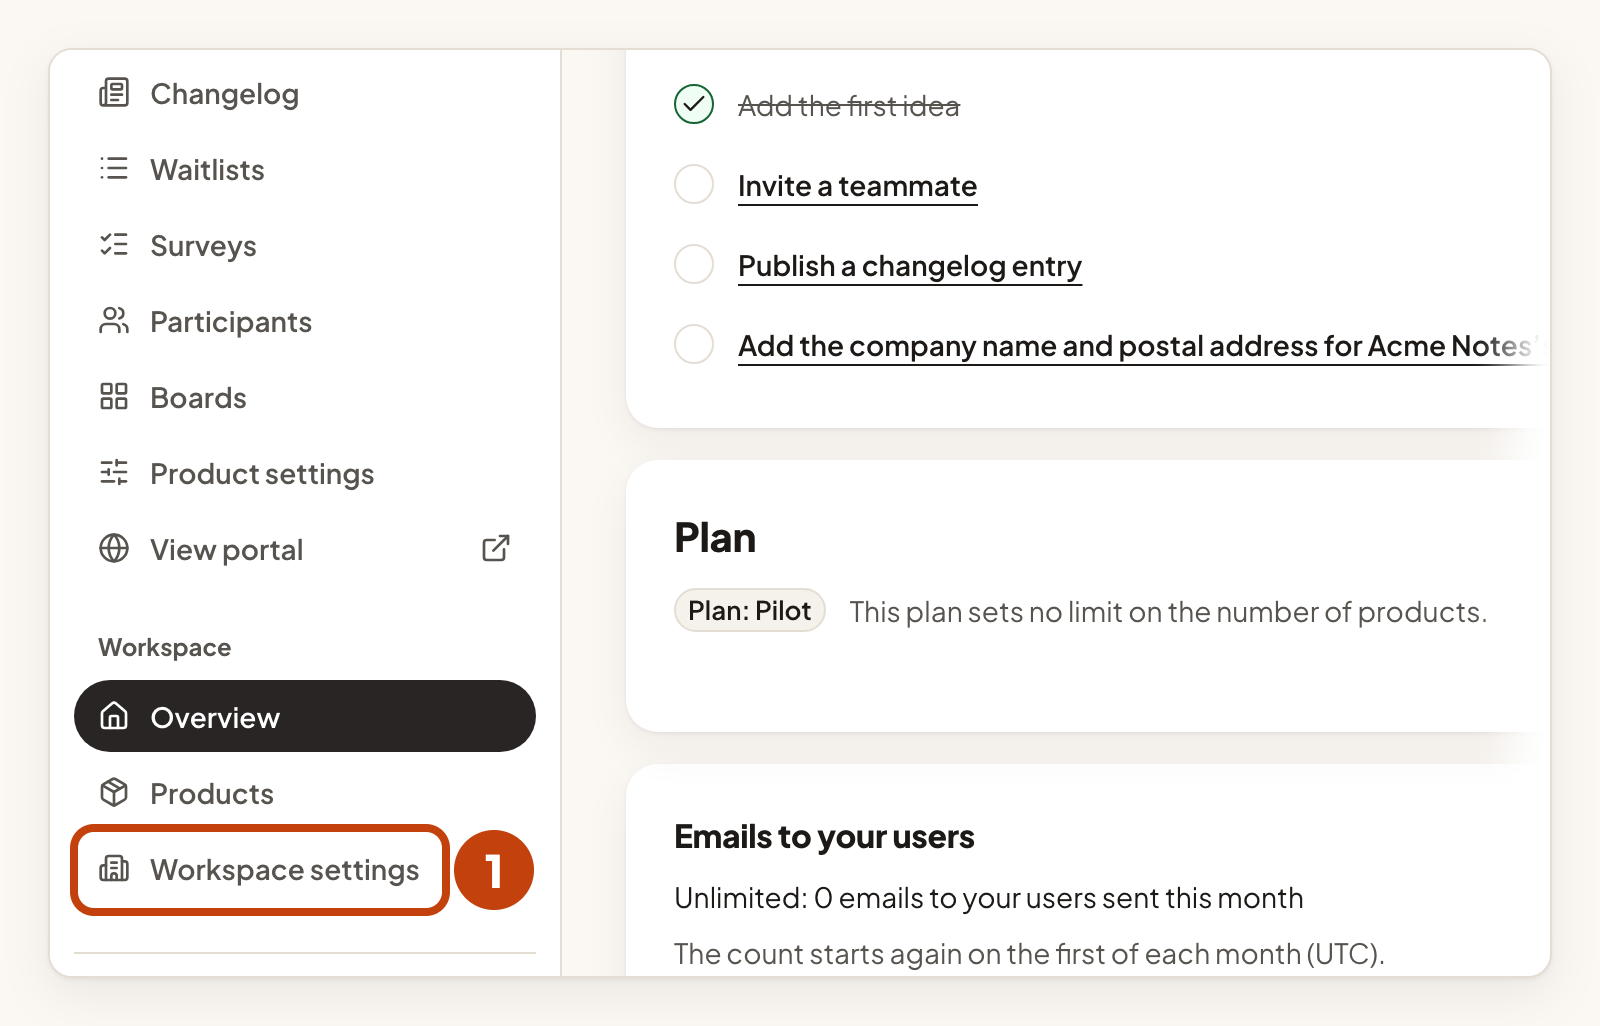
- Open Workspace settings in the sidebar.
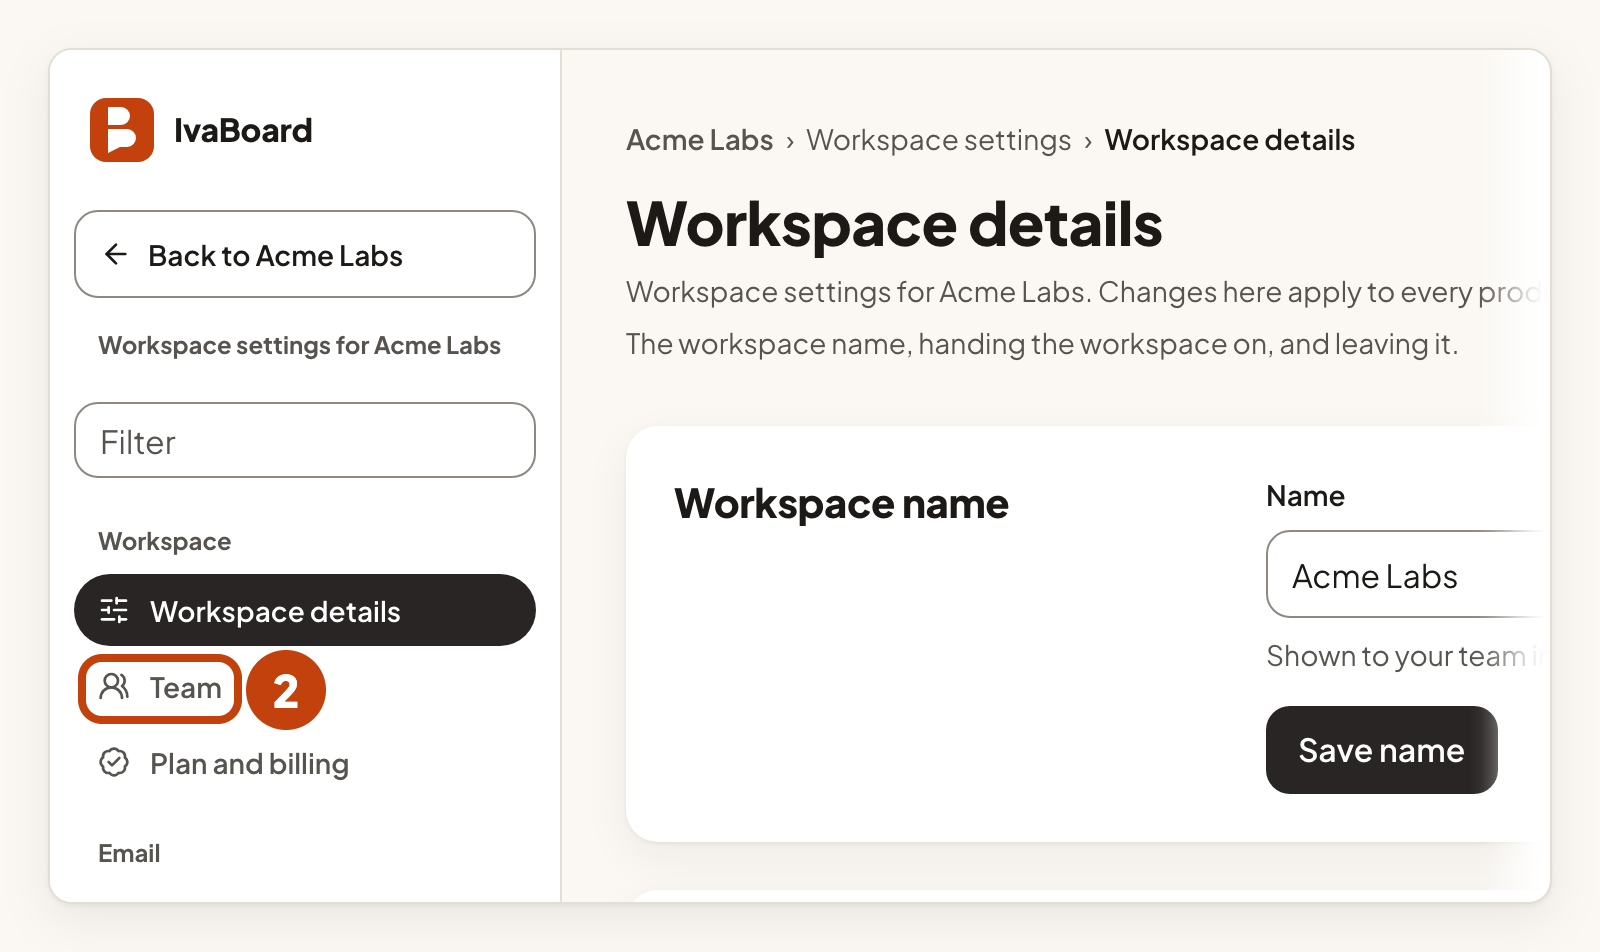
- Select Team in the settings menu.
- Under Invite a teammate, enter their Email address.
- Choose their Role: Owner, Admin or Member.
- Under Product access, choose a level for each product they should see, or keep No access.
- If you like, set Access ends for a product. Access stops at the start of that day, in UTC.
- Select Send invitation.
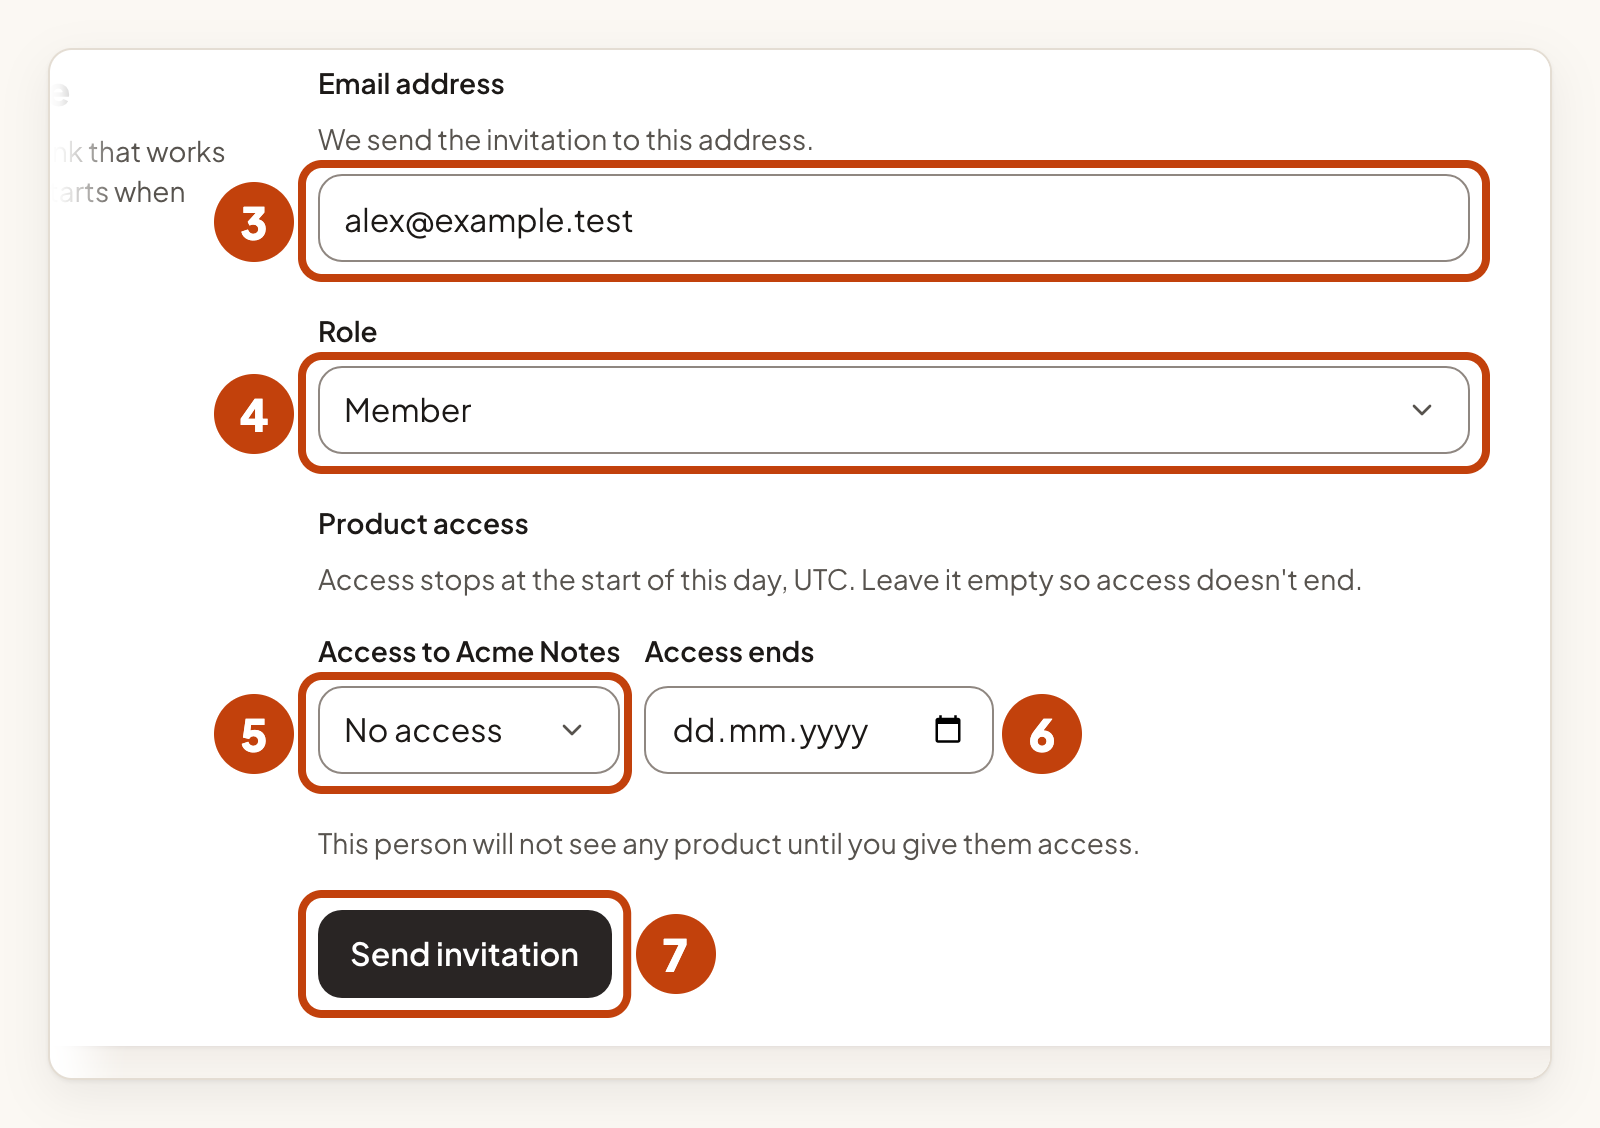
The invitation email has a link that works for seven days. Their access starts when they accept. Leave Access ends empty if access should not end.
If the person you invite is an owner or admin in any workspace, they set up two-step sign-in before they can join.
Inviting an owner or an admin, or giving the Manager level on a product, may ask you to sign in again first.
You can send up to 20 invitations a day for each workspace. A new link for an invitation counts toward the same limit. Each invitation can give access to up to 50 products.
For the roles, see Roles and product access.
Send a link again or revoke an invitation
Pending invitations lists the invitations that are waiting to send, sent, or expired. Each row shows its status and when its link expires.
To send a new link, select Resend on the row. The new link works for seven days from when it is sent. Wait at least ten minutes between sends for the same invitation. An admin cannot resend an invitation for an owner.
To stop an invitation, select Revoke on the row. Then select Revoke invitation in the box. The old link stops working at once, and you cannot undo this. To invite the person again, send a new invitation. An admin cannot revoke an invitation for an owner.
If the address already has a pending invitation, the form tells you.
What your colleague does
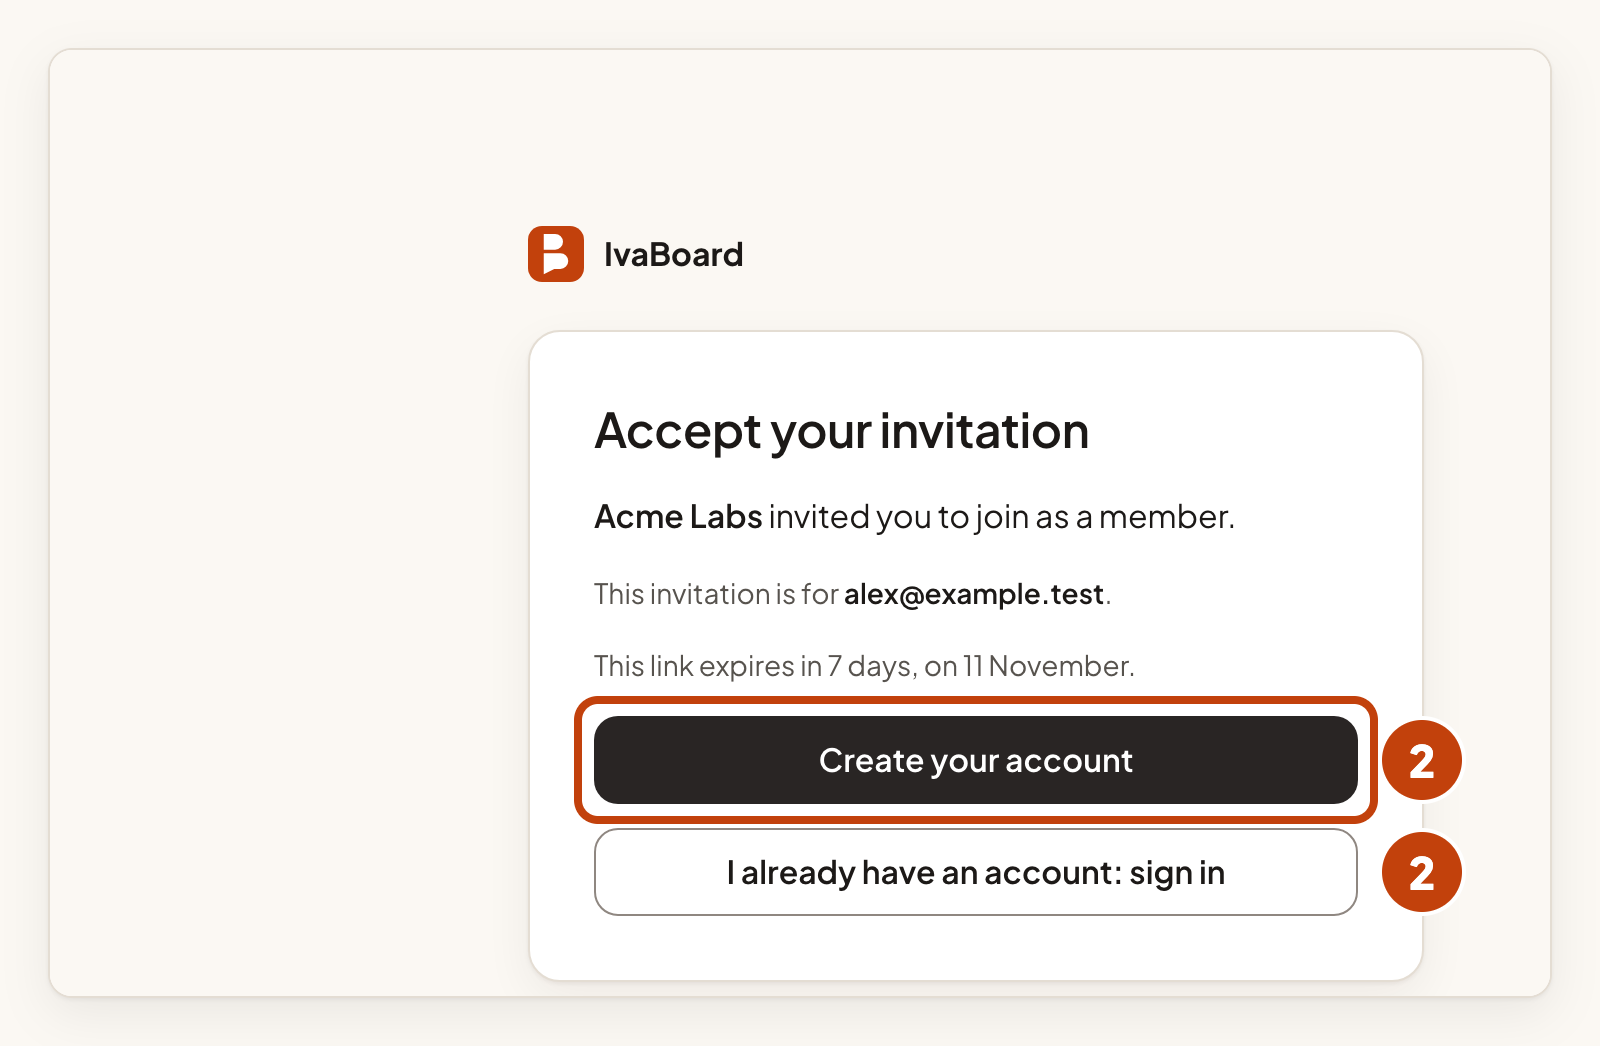
- In the invitation email, select Accept invitation.
- Select Create your account if you are new, or I already have an account: sign in if you have one.
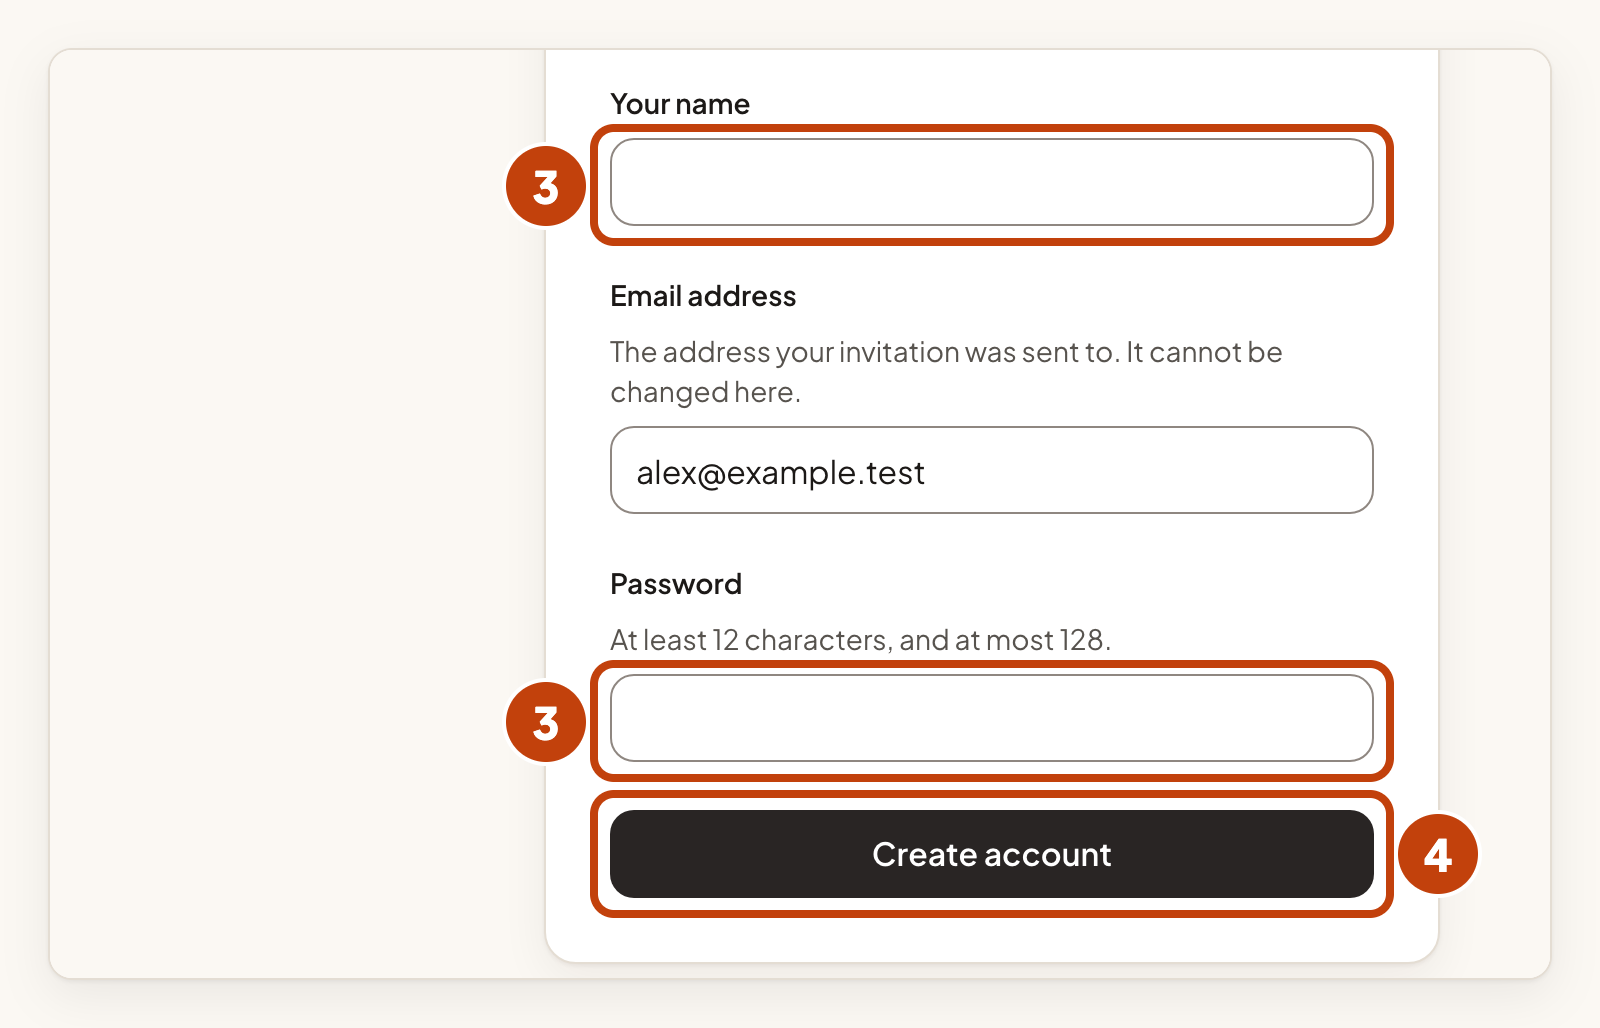
- Enter your name and a password. This applies to a new account only.
- Select Create account. This applies to a new account only.
- In the confirmation email we send to the invited address, on the same device, select Verify email address. This applies to a new account only.
- Sign in with the invited address and your password. This applies to a new account only.
- Select Accept invitation.
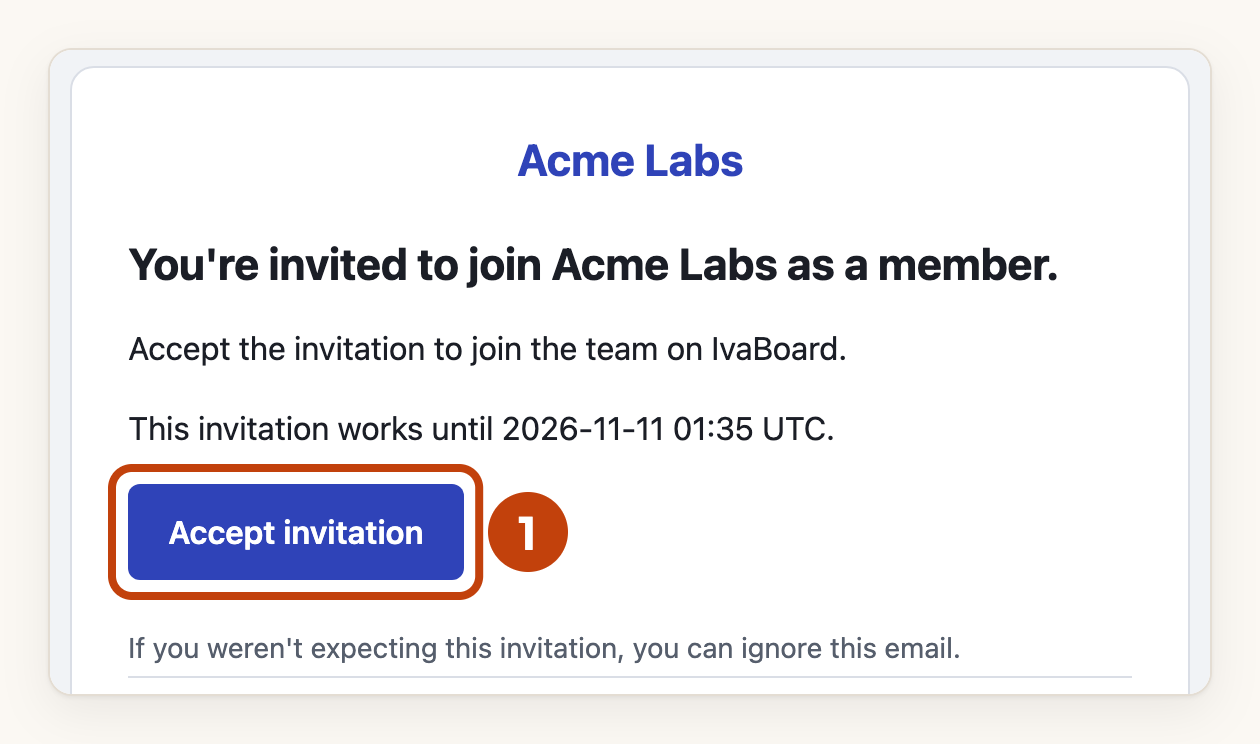
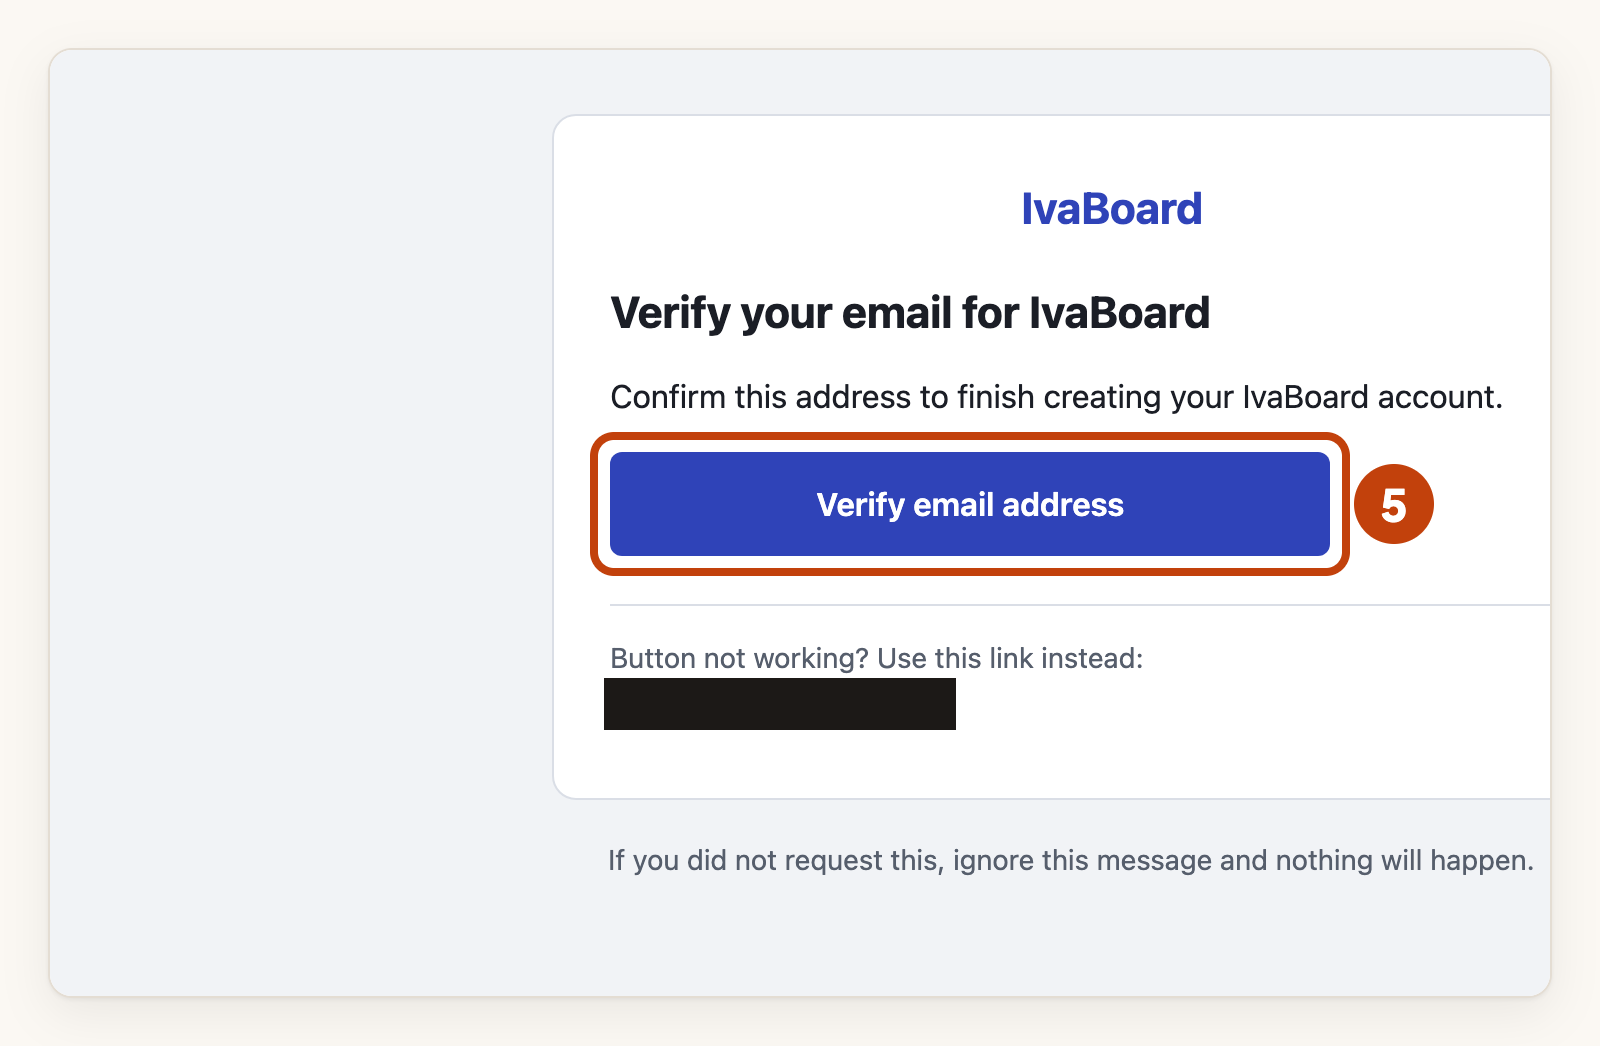
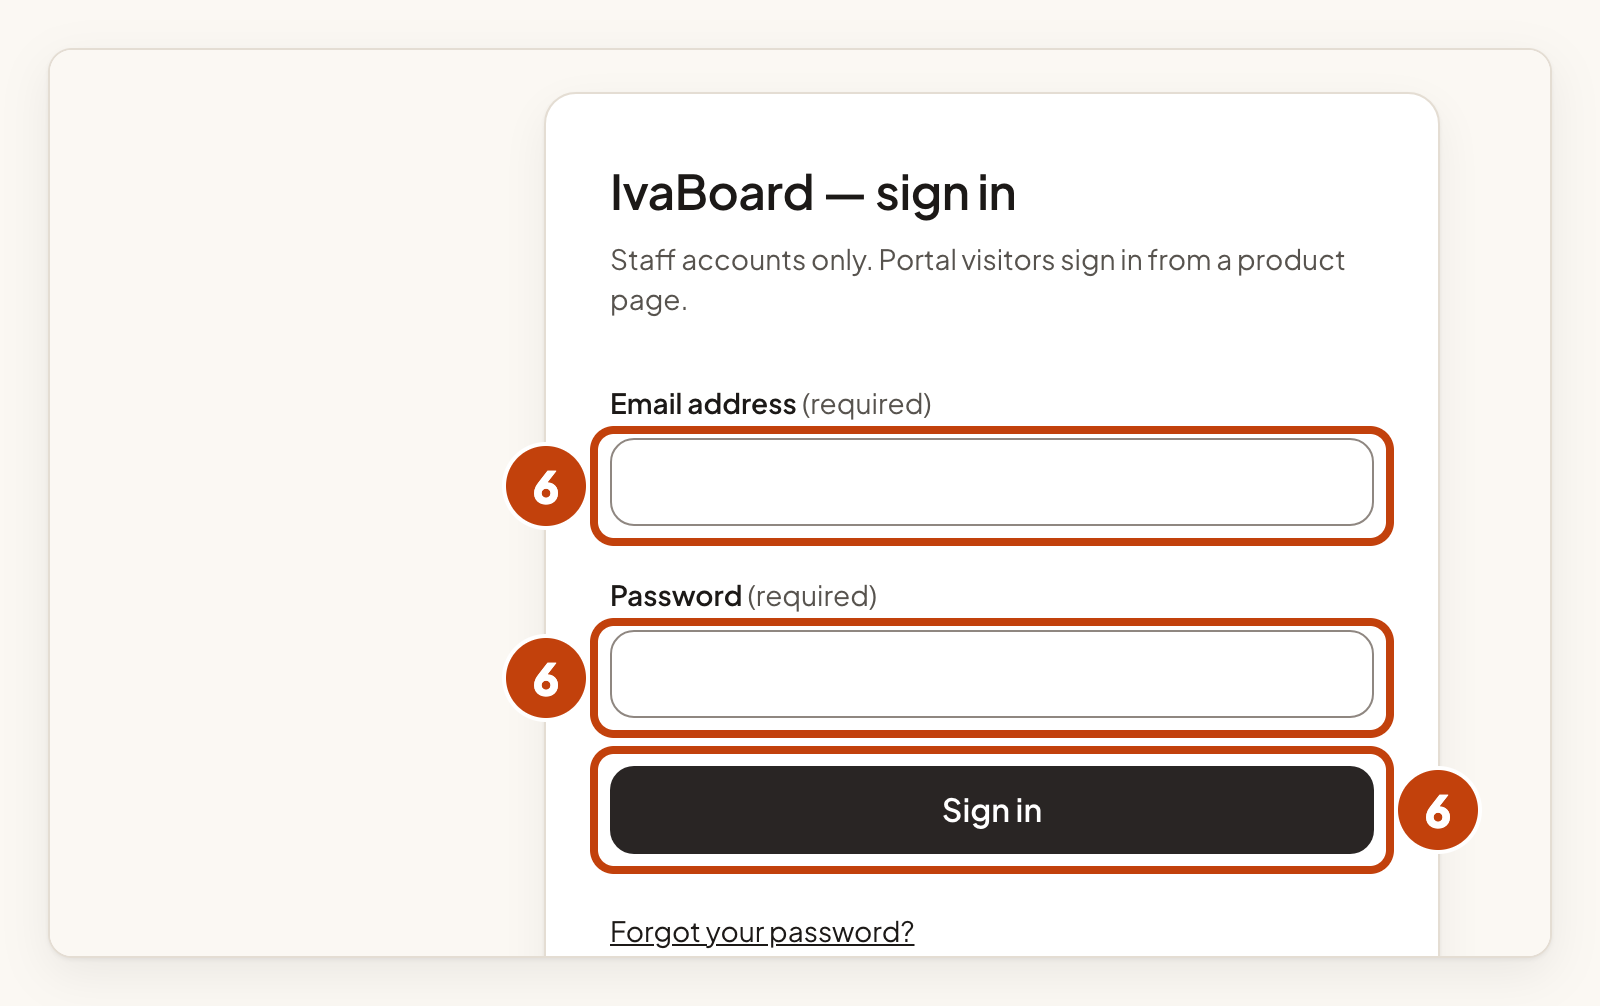
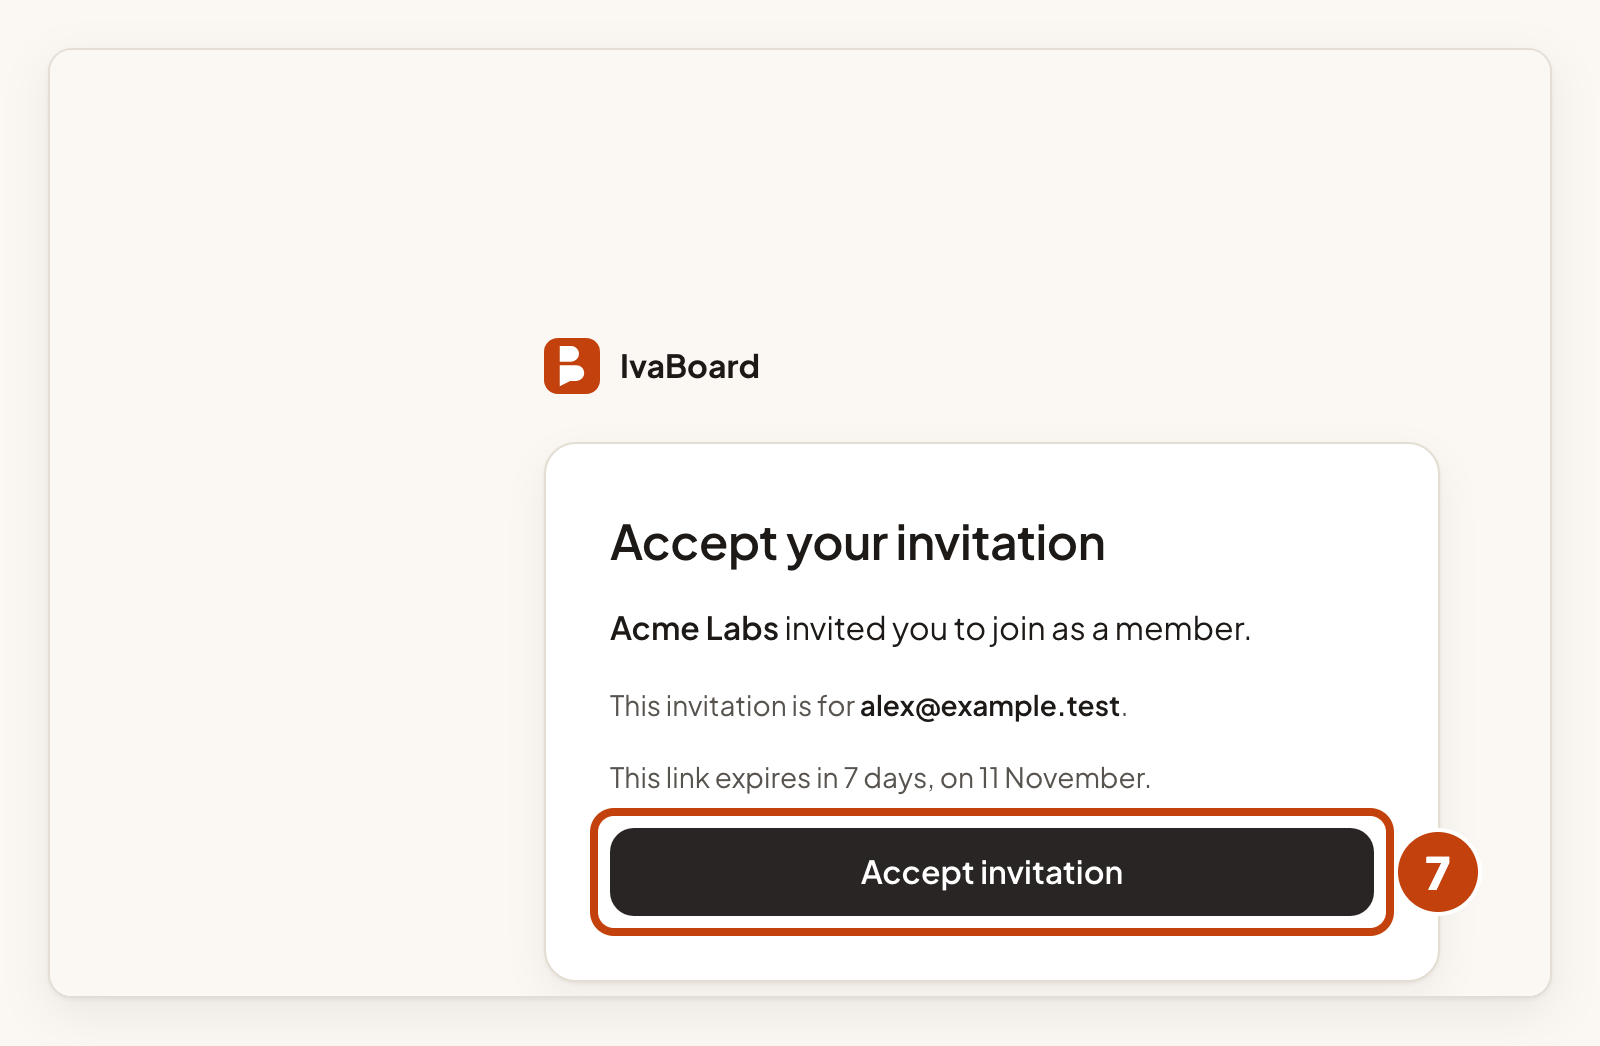
Confirming the address does not sign you in: step 6 does. The link works only for the address it was sent to, so sign in, or create the account, with that address.
If you are an owner or an admin and your account has no two-factor authentication yet, select Set up two-factor authentication first. You return to your invitation afterwards.
Remove someone
- In the Members list, select Remove on that person's row.
- Select Remove member in the box.
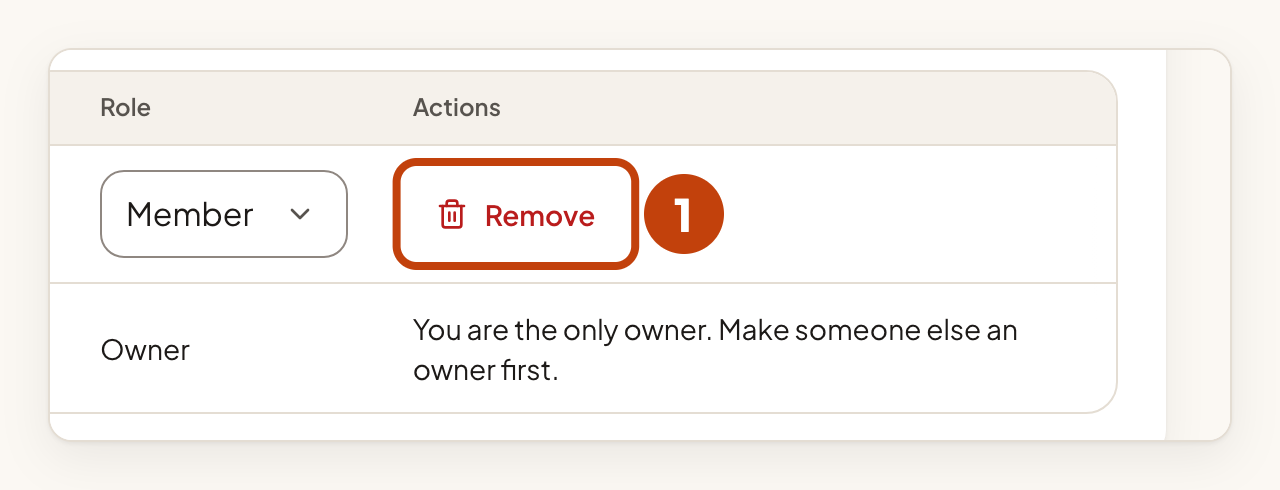
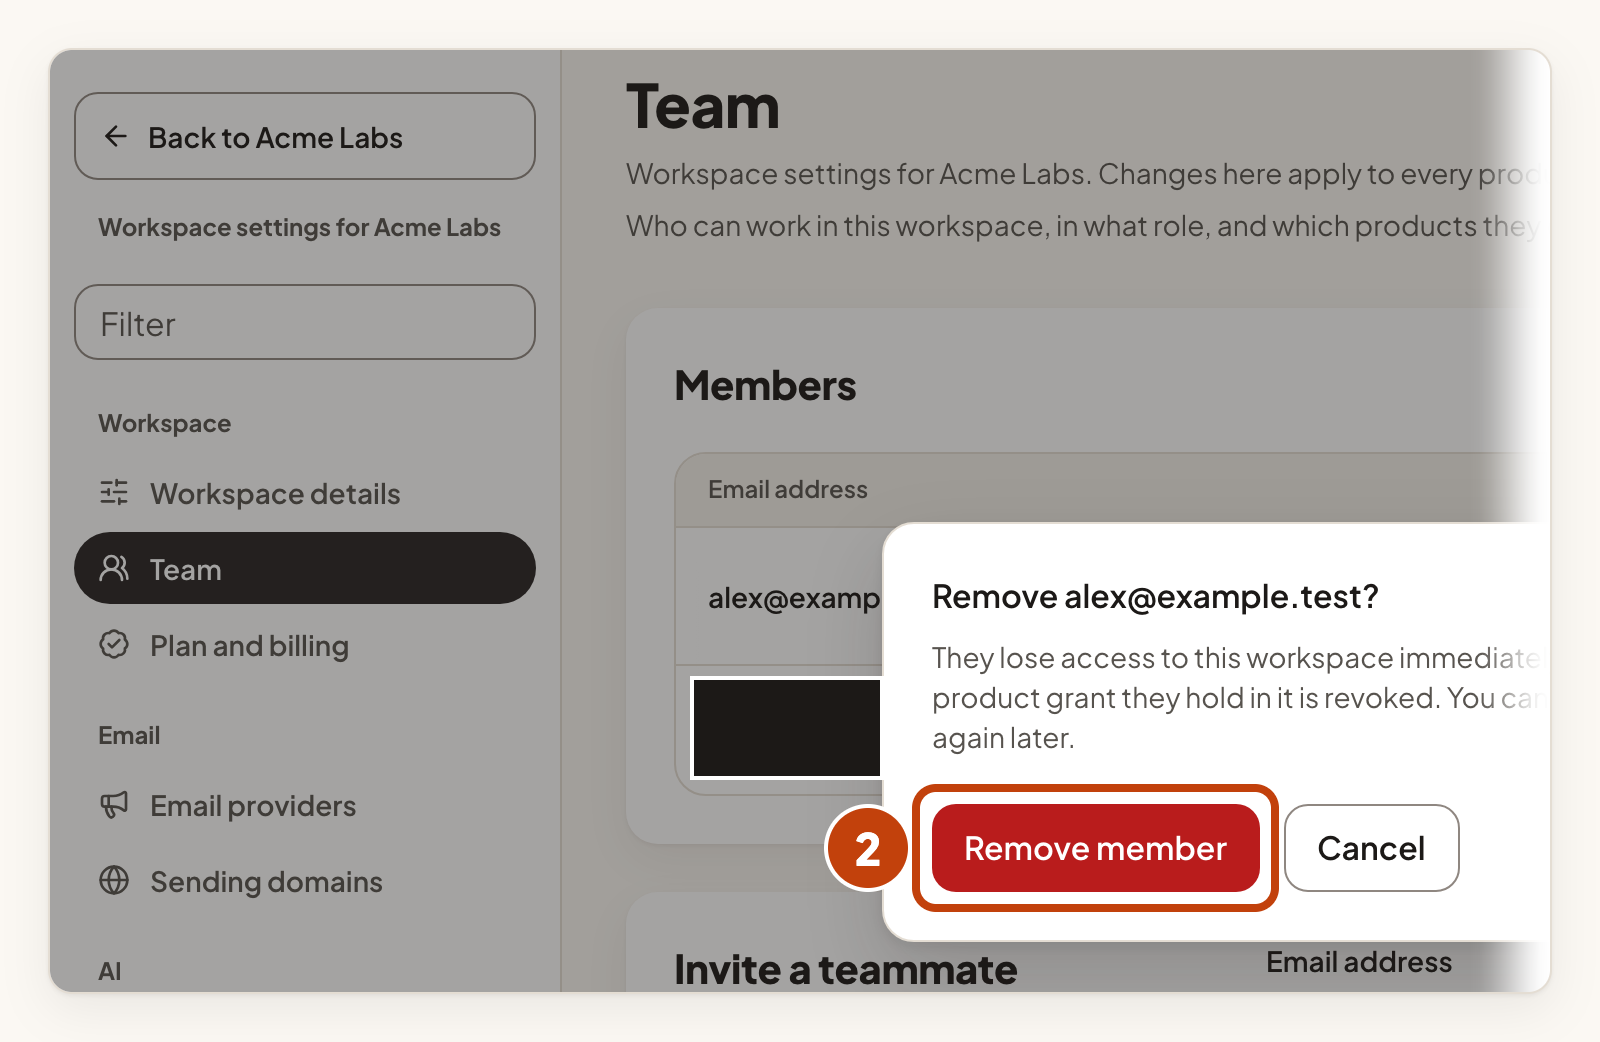
They lose access to the workspace at once, and every product access they held is removed. You can invite them again later. A workspace must always keep at least one owner.
Example
For example, to invite Sam at [email protected] as a member who can moderate ideas in Acme Notes, enter [email protected] under Email address. Keep the Role as Member. Set the level for Acme Notes to moderator. Select Send invitation. Sam gets an email with a link that works for seven days.
