Brand your portal: name, logo and colours
Your portal can carry your brand. Choose an accent colour, add links to your website, privacy policy and terms, and upload your logo. Your customers see the changes once you save.
Who can use it
An owner, an admin or a product manager can change the branding. Other team members can look at it, but they cannot change it.
| What | Plans |
|---|---|
| Accent colour and links | Every plan |
| Colours, layout and landing page | Every plan. See Choose your portal's layout and voting style. |
| Your own logo | Growth, Scale and the Lifetime White-label plans |
If your plan does not include white-label, the logo section explains this and links to the pricing page.
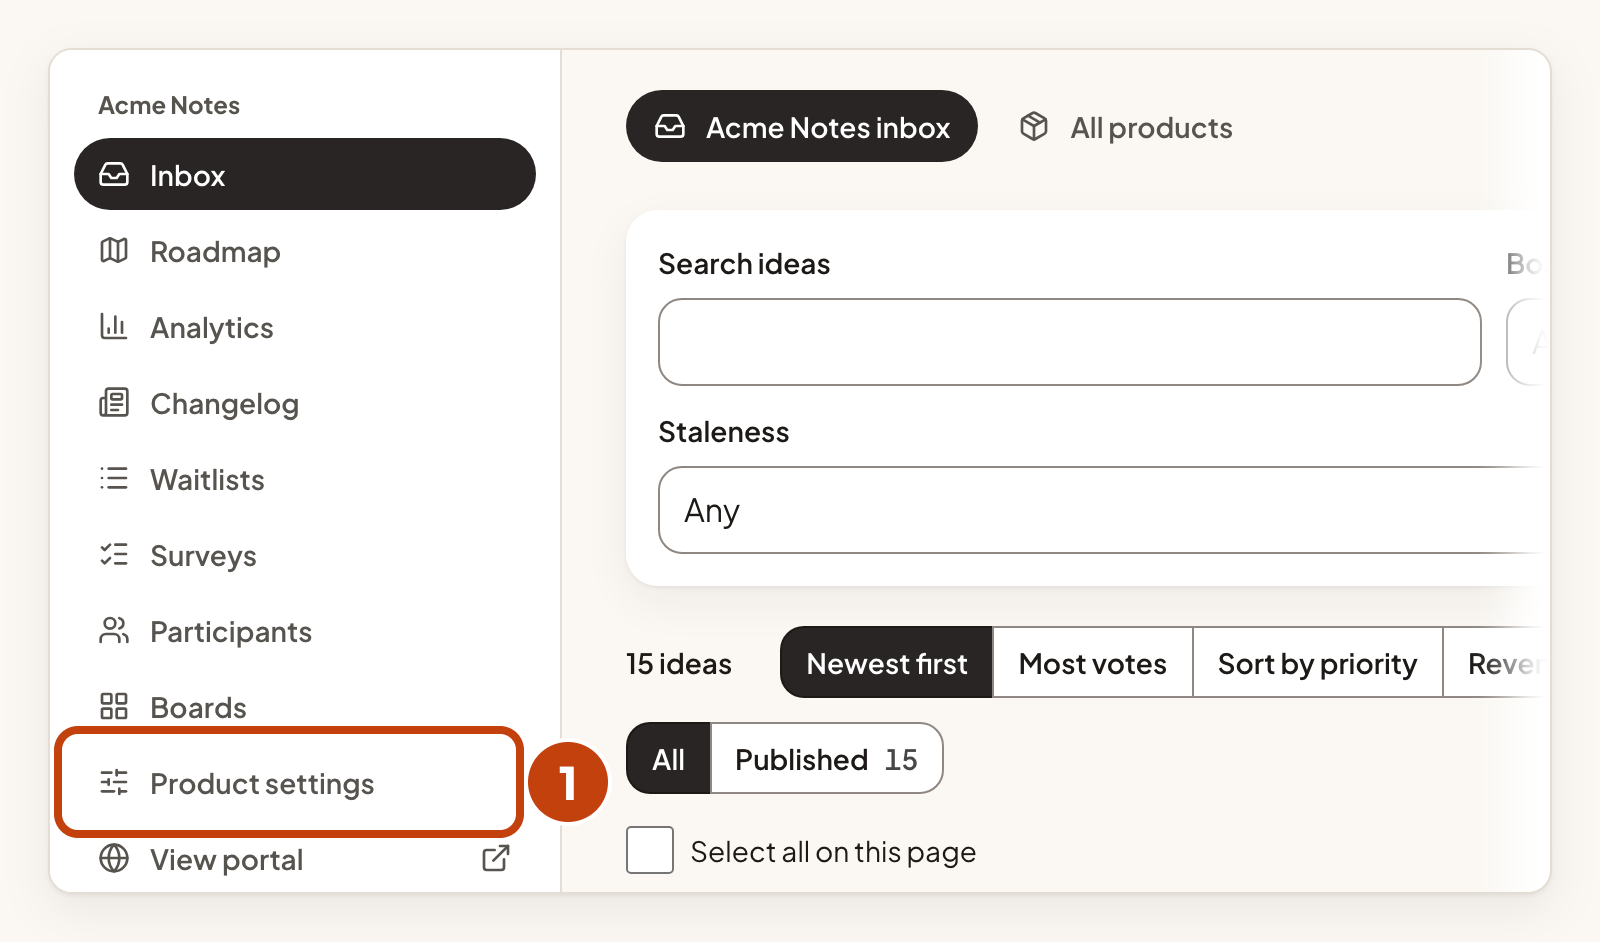
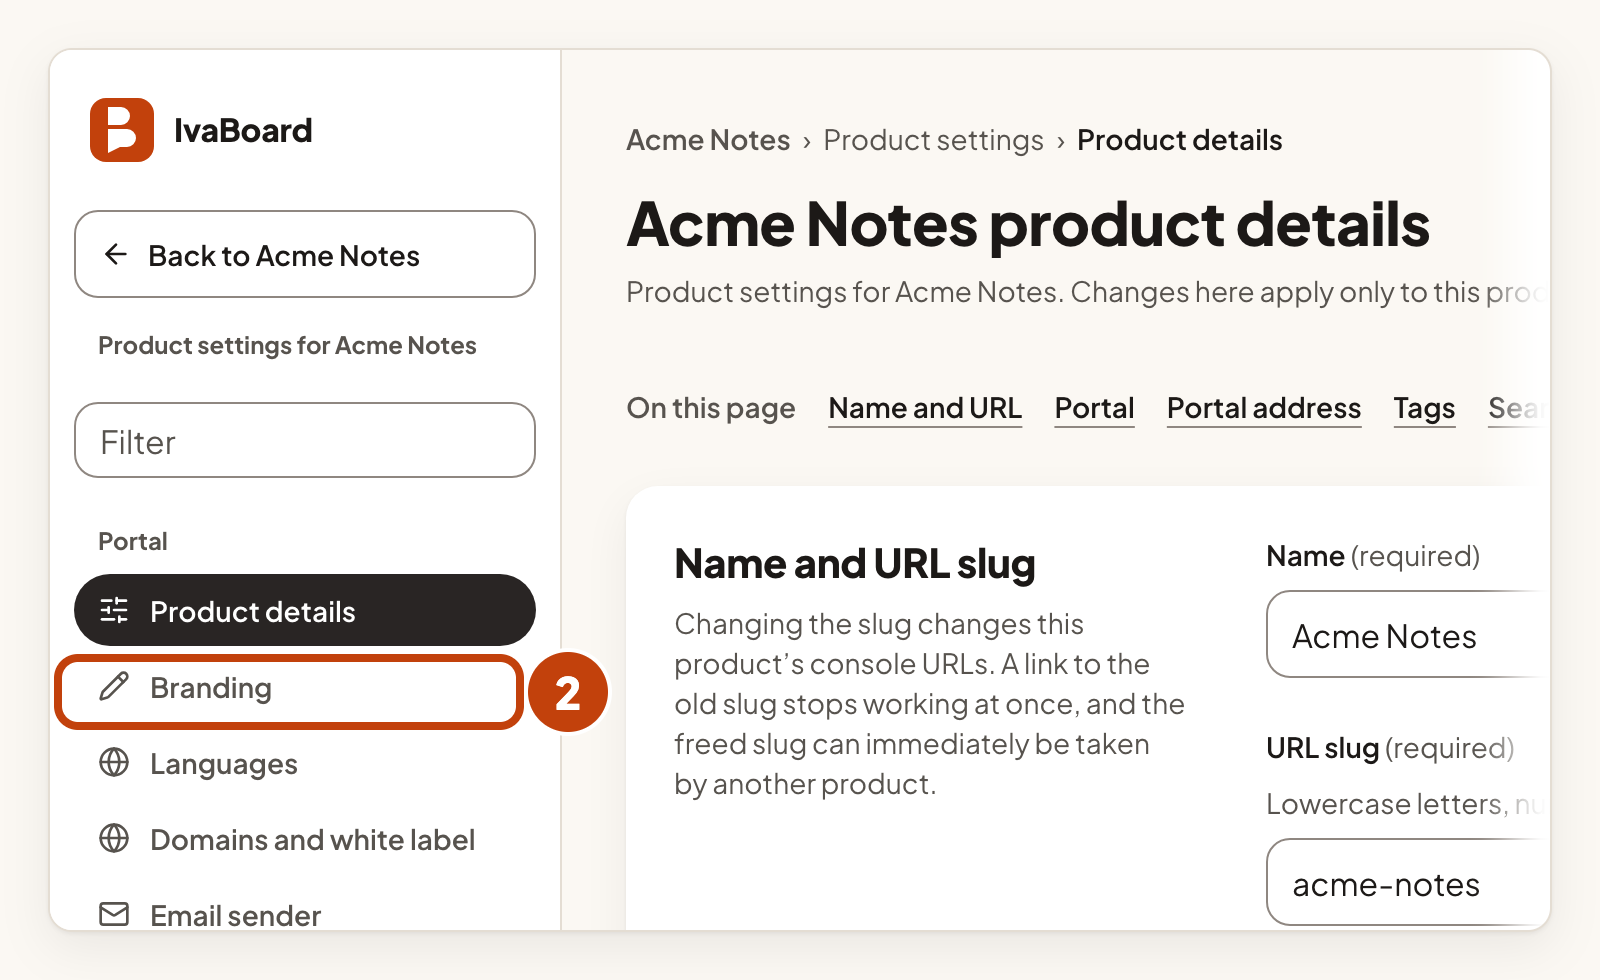
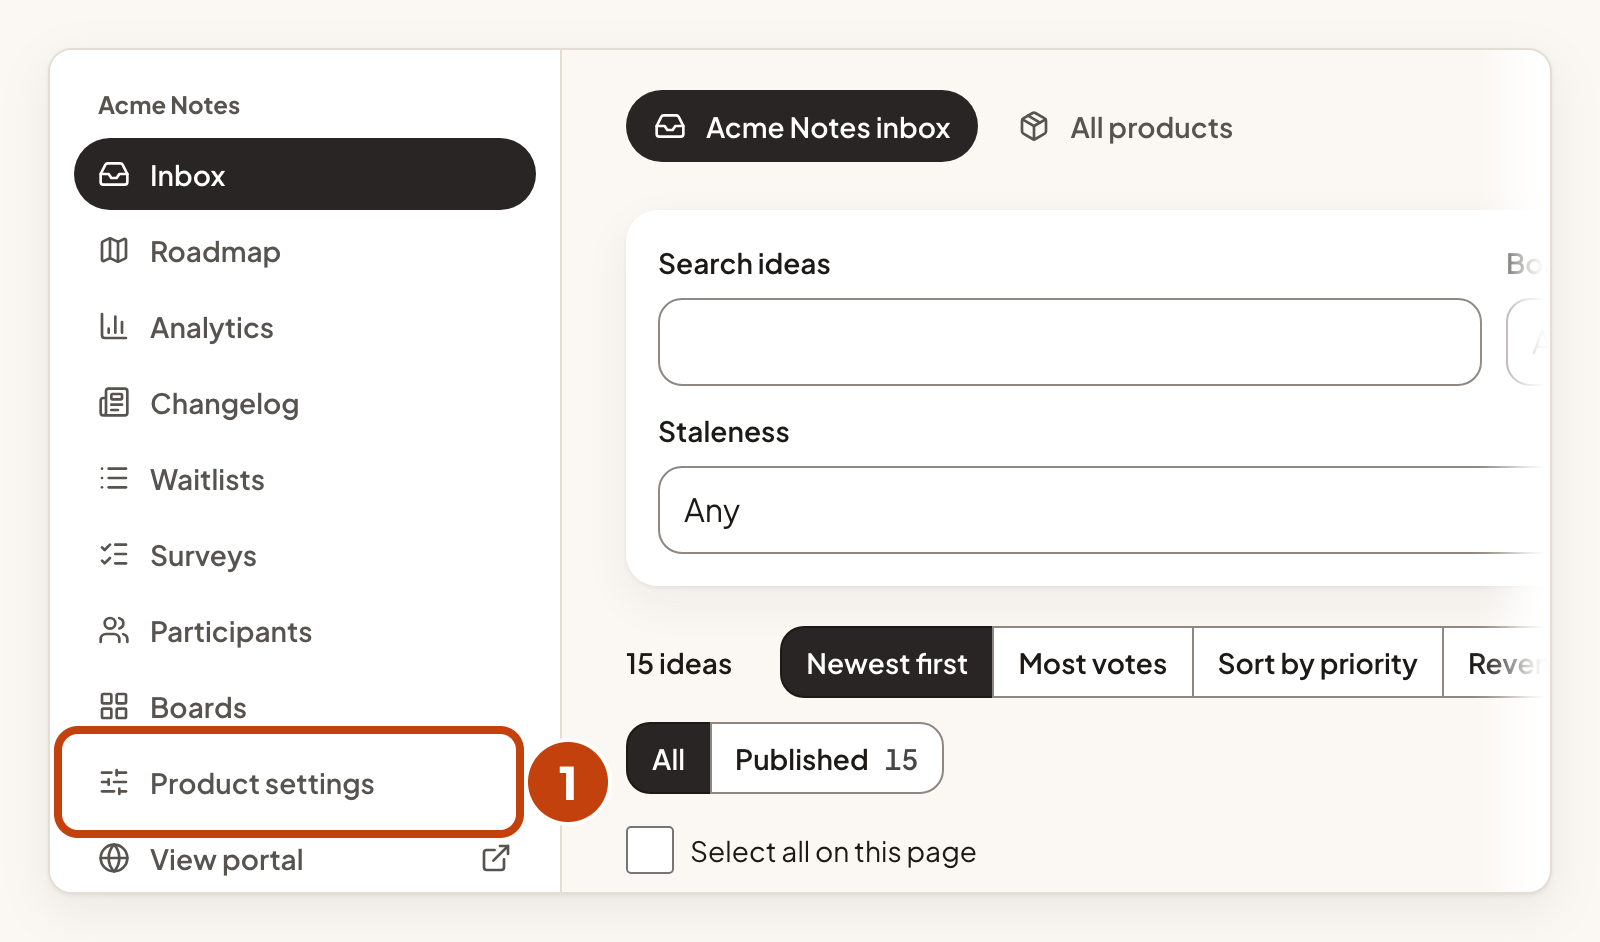
Open the Branding page
- Select Product settings in the sidebar.
- Select Branding in the settings list.
Set your accent and links
- Under Portal accent, choose a colour: Coral, Indigo, Teal, Plum or Slate. Coral is the default.
- In Privacy policy link, type the full address, starting with
https://. This is optional. - In Terms link, type the full address, starting with
https://. This is optional. - In Website address, type your website, starting with
https://. This is optional. - Select Save branding.
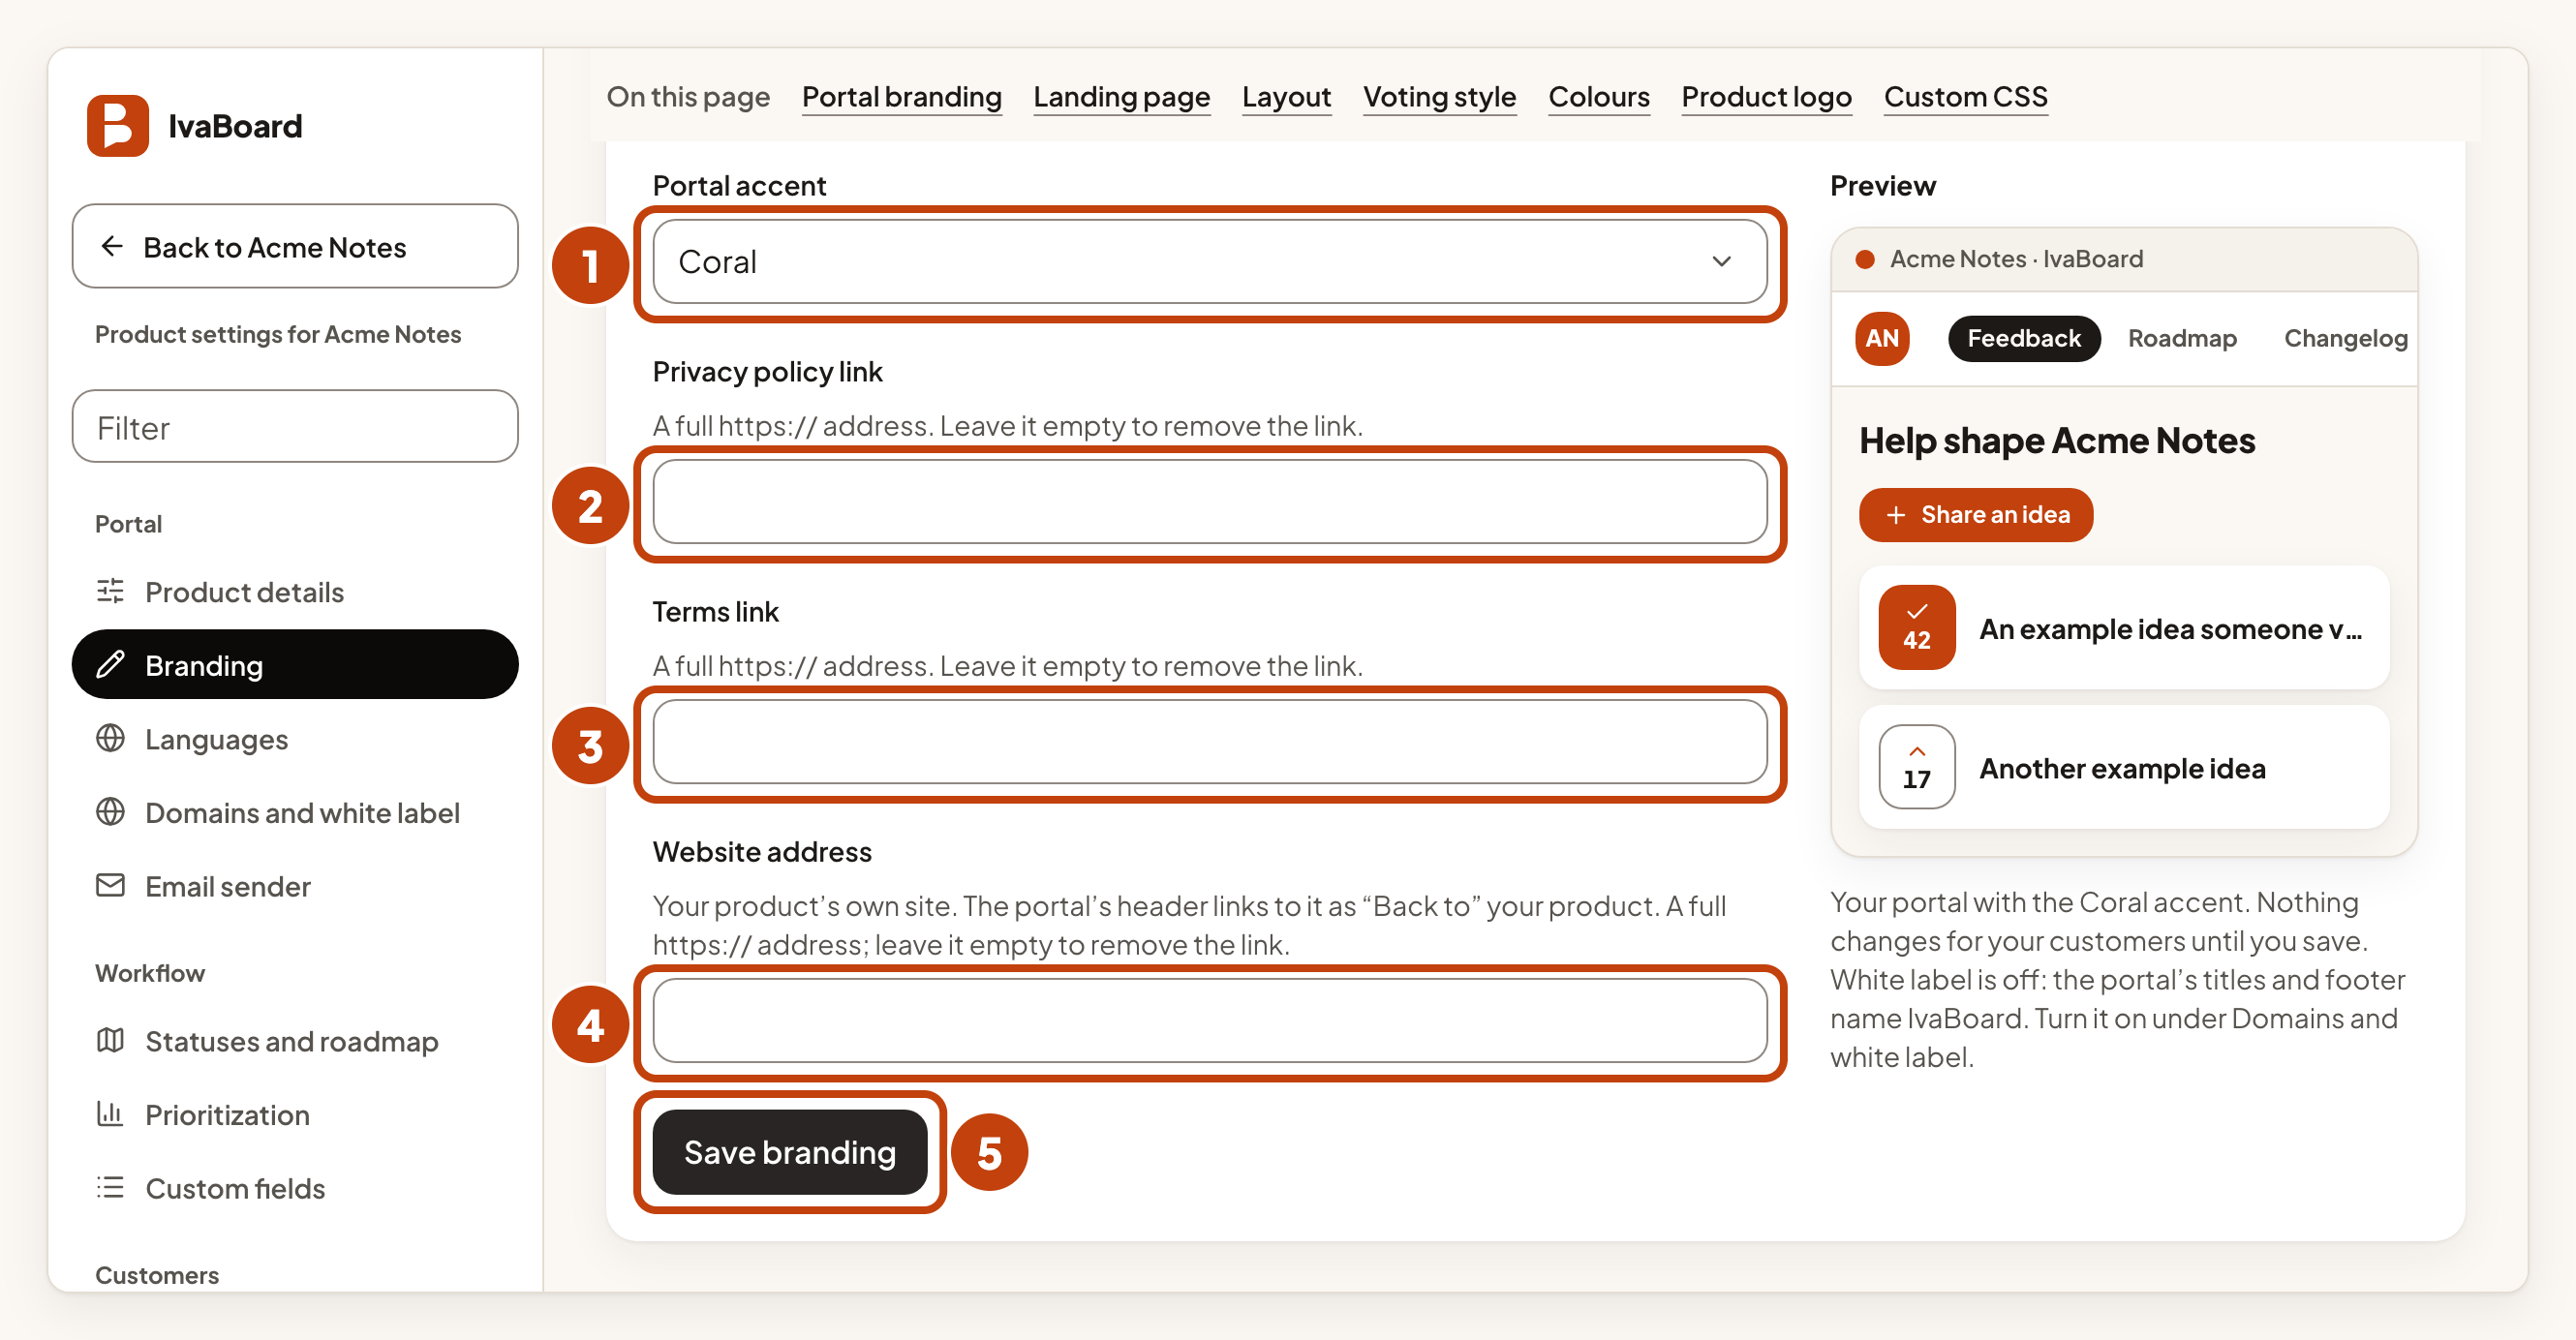
Leave a link box empty to remove that link. The privacy policy and terms links appear in the footer of your portal. Your website address appears in the header as Back to followed by your product's name.
Every accent comes from a fixed set, so your portal stays readable. The preview on the page shows the accent you have chosen before you save.
Add your logo
Uploading a logo needs a plan with white-label.
- Under Logo, choose an image from your computer.
- In Logo description, type a short description, such as your product's name.
- Select Upload logo.
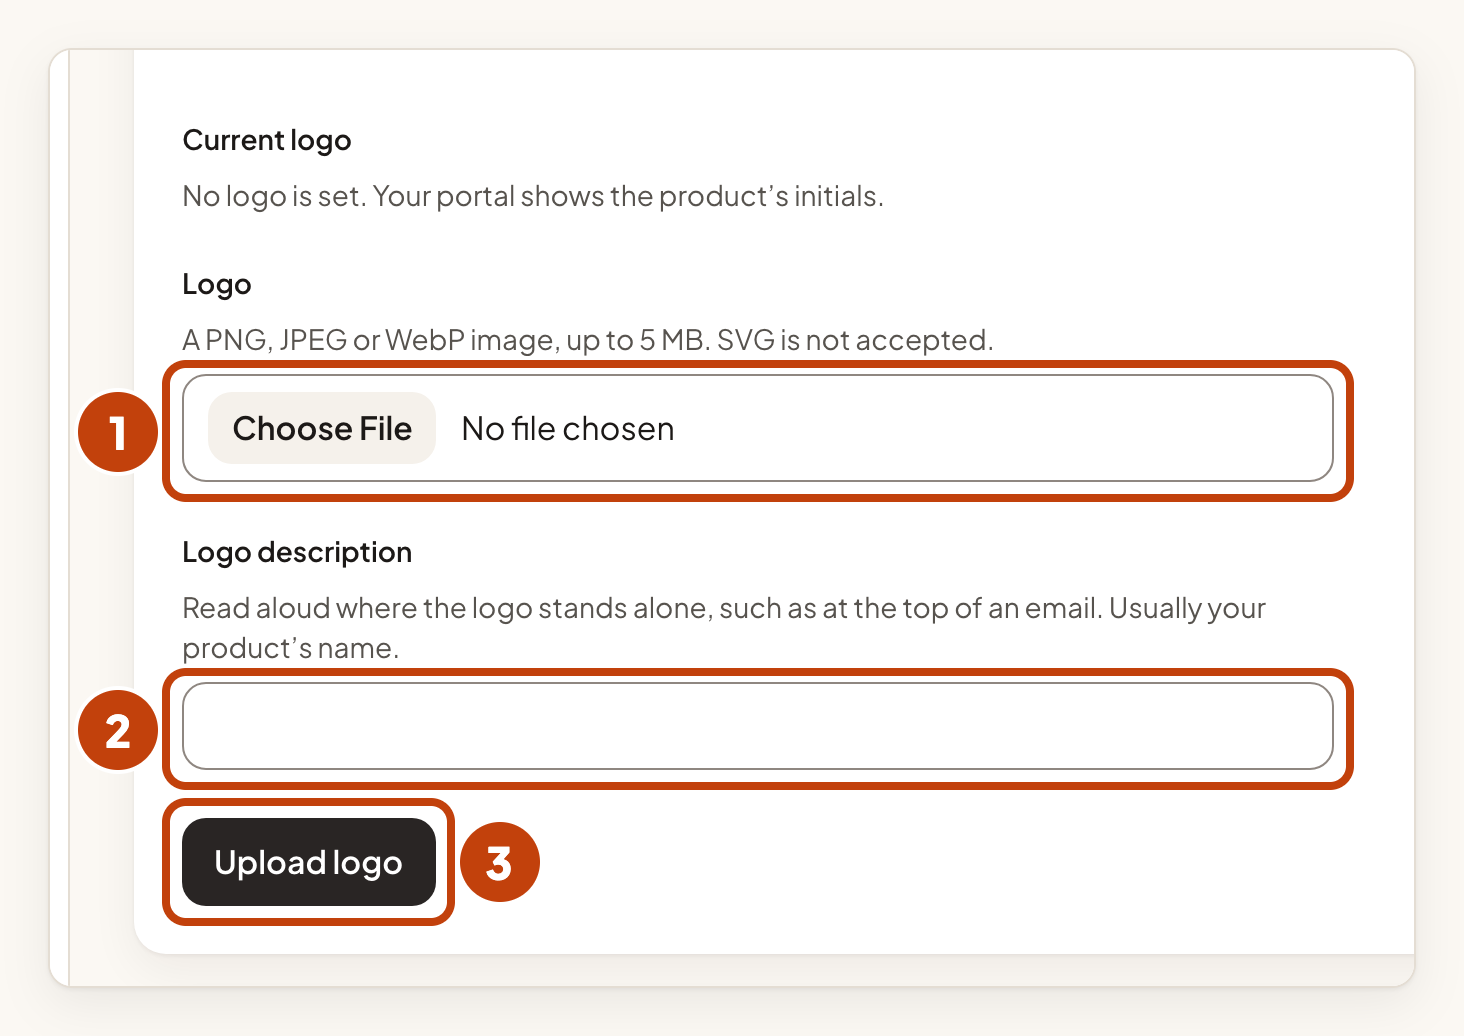
The file must be a PNG, JPEG or WebP image up to 5 MB, and at most 25 megapixels. SVG files are not accepted. IvaBoard resizes the logo to fit 512 by 512 pixels. The description is read aloud where the logo stands alone, for example at the top of an email.
Your portal shows the logo in its header, in place of your product's initials. The logo also becomes the browser tab icon.
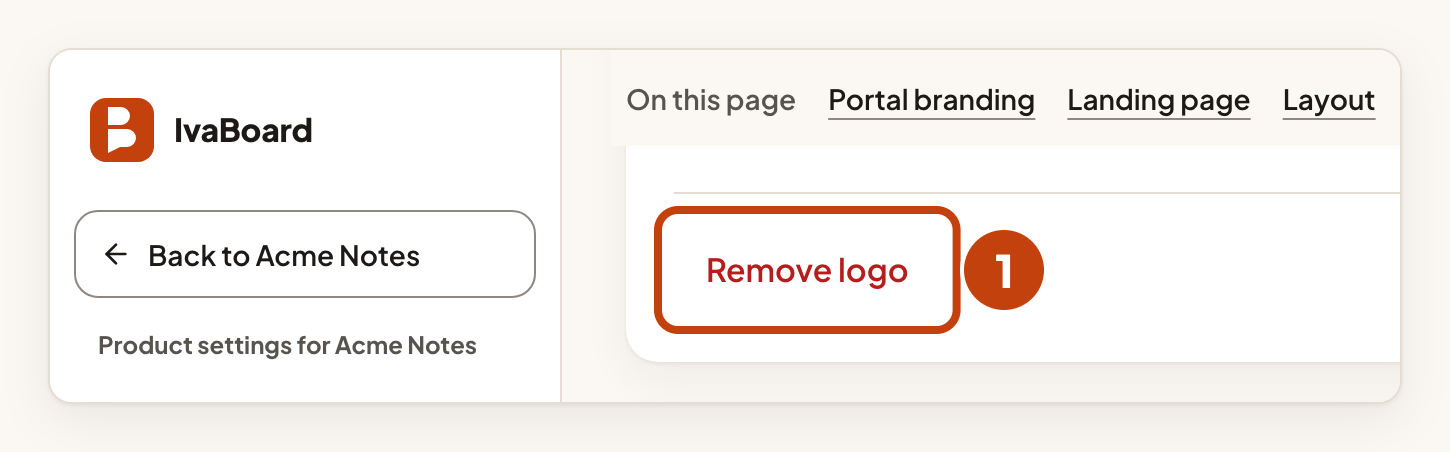
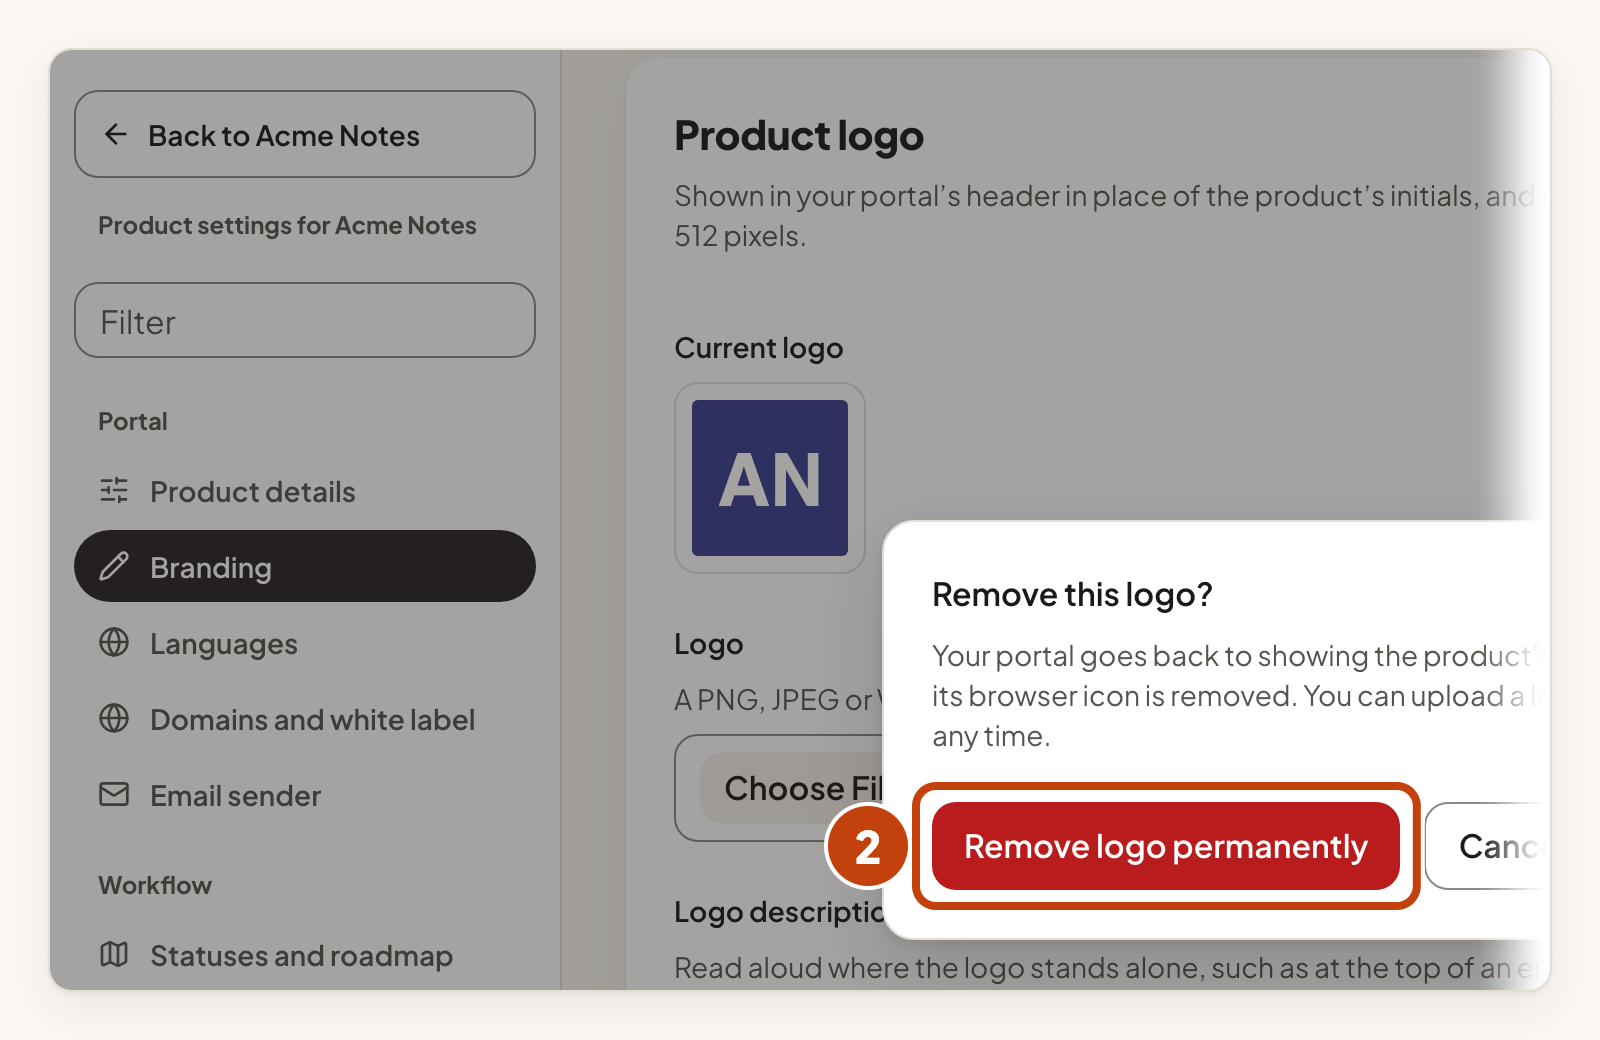
Go back to your product's initials
- In Product logo, select Remove logo.
- Select Remove logo permanently in the dialog.
If your workspace later leaves a white-label plan, a logo you already uploaded keeps showing. You can remove it, but you cannot replace it.
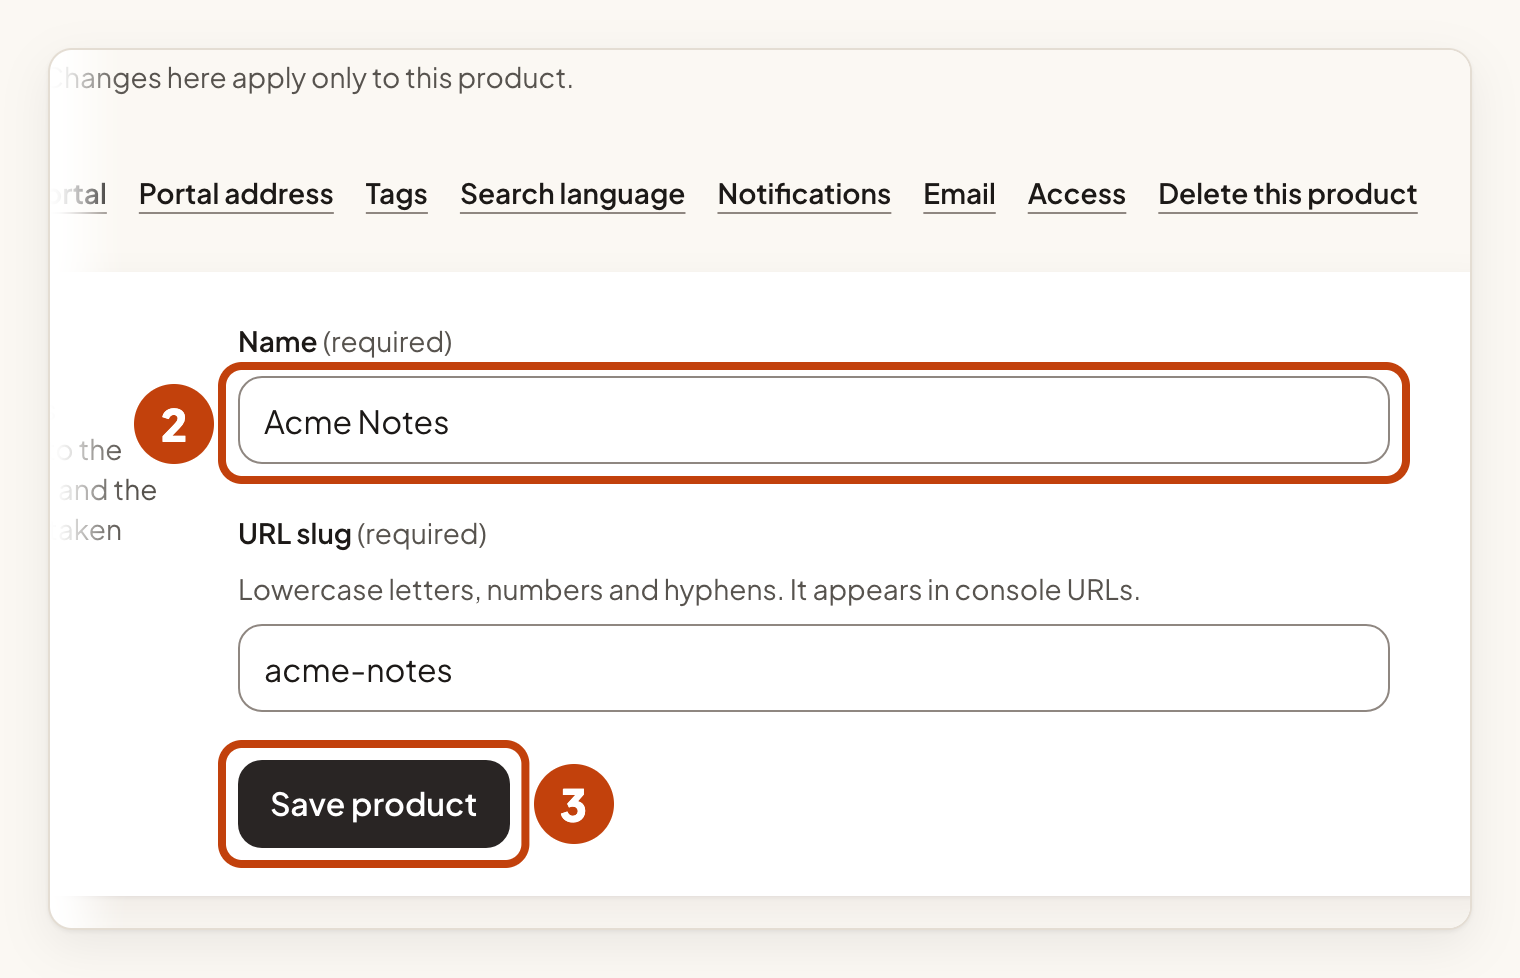
Change your product's name
- Select Product settings in the sidebar.
- In Name, under Name and URL slug, type the new name.
- Select Save product.
Changing the URL slug in the same section changes your product's console addresses. Links to the old slug stop working straight away.
Light and dark
Your visitors can switch between a light and a dark look. The accent is adjusted for both, so you do not need to choose twice.
Example
For example, Sam at Acme Notes chooses Teal under Portal accent and types https://example.com under Website address. Sam sees the teal accent in the preview before selecting Save branding.
